
We have had prospects spend time, money, and resources trying to execute the data migration to Microsoft Dynamics 365 Finance & Supply Chain Management using development without any idea about the existing challenges waiting for them. Many of them struggle with just identifying the right data entities in the Data Management Framework as there is a knowledge gap. Additionally, the data coming in from the legacy ERP system needs to be completely transformed to fit into the D365 F&SCM data structure. This can be even more challenging when you have data from other ISV solutions and multiple ERPs that need to be migrated to D365 F&SCM. The data quality is questionable and cannot just be migrated to D365 F&SCM without data cleansing and validations.
Microsoft’s Data Management Framework does offer staging, validation, and mapping but there is no way to transform that data without writing code. When you take the development route, you are spending a lot of time and effort in the setup-release-test cycles, and even after that there is no guarantee of success.
Our no-code solutions for Data Migration, Connectivity Studio, and Data Quality Studio can help you solve these challenges and ease and speed up complex data migration projects. Built within Dynamics 365, Connectivity Studio can map any table/any field using the same business logic as D365 F&SCM and manipulate data, without coding. Data Quality Studio allows you to check the data quality based on the conditions and validations set up in real time. Both these solutions are integrated so they work well together during data migrations to ensure you are importing clean data into D365 F&SCM.
Since we have a lot of prospects who want to understand how these solutions work in action, we share two scenarios in this blog and demonstrate how you can carry out these use cases using our solutions built within Dynamics 365.
Scenario 1: Customer import with a custom field added (via data entity)
Step 1: Configure the field in interface mapping
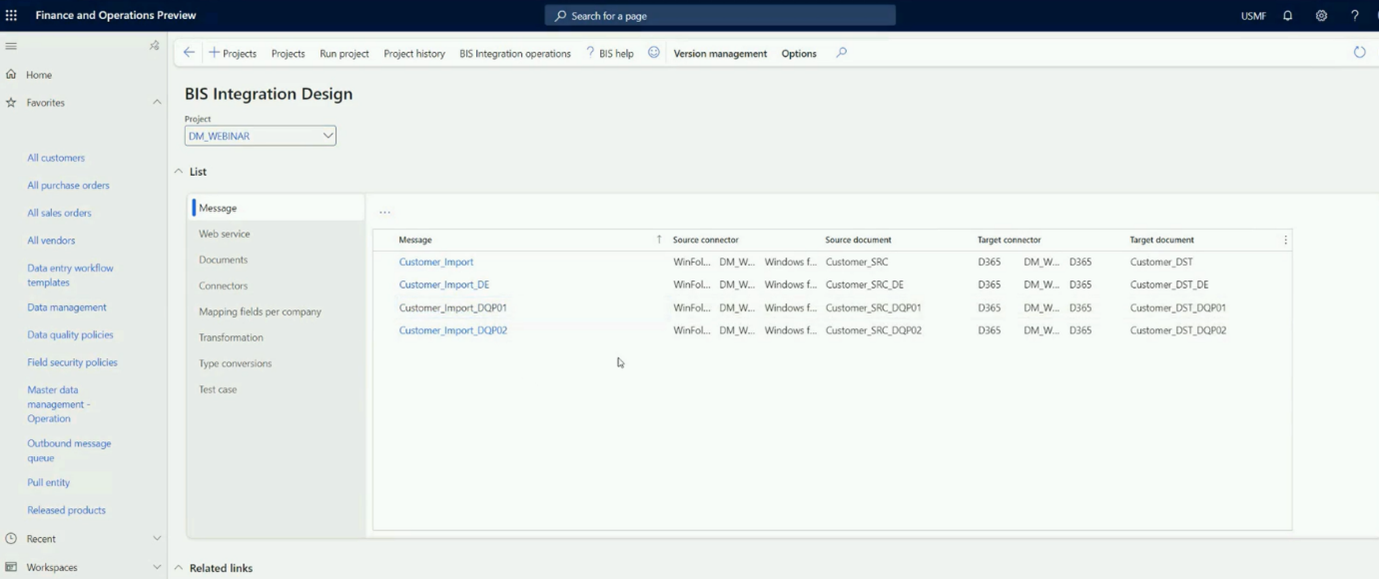
The first step is to configure the custom field in the message for interface mapping. So, first things first, you click on the BIS Integration Design module from the dashboard. For the sake of the demonstration, we have added a custom date field in a customer record. Next, we select and click on the customer import message from the list.
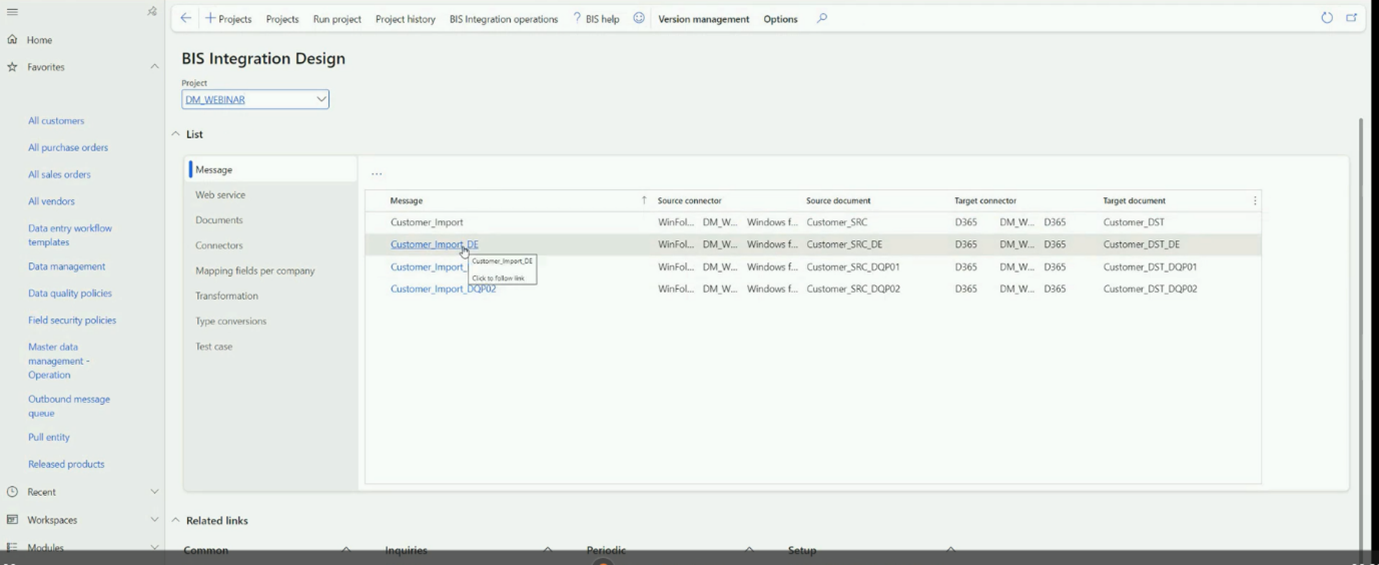
On the top, in the menu, you will see all the options for the Source and the Target that will help you map messages. Click on the Document option under the Target tab.

Since Connectivity Studio is an embedded solution, you can see and select any data entity from the record option. Here we add and select CustCustomerBaseEntity. Next, you need to preselect the mandatory fields that need to be present for the record. We have selected the first row.
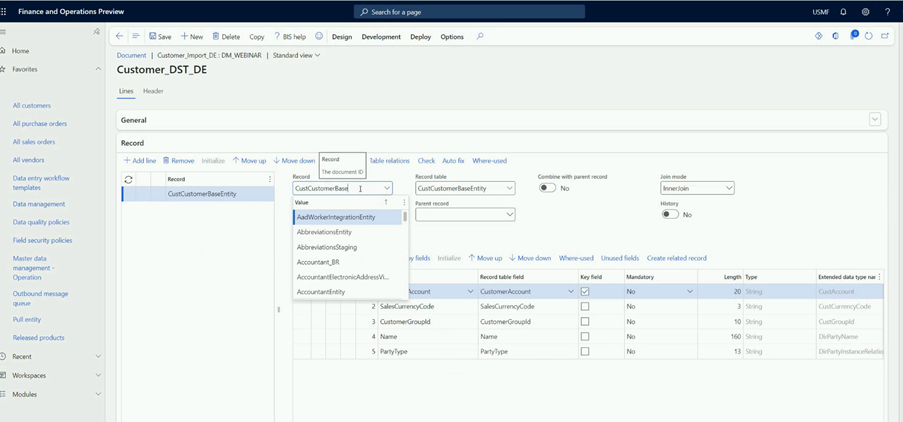
Step 2: Add the custom field
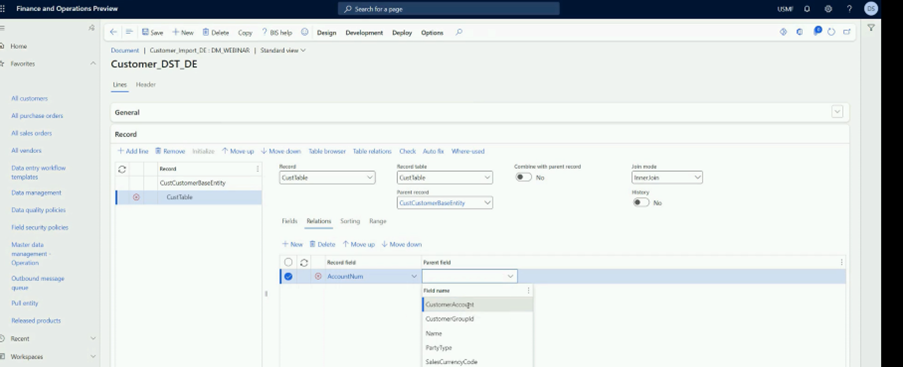
Next, you add the custom field to the new record, so we add the CustTable in the record and the data entity from D365 F&SCM in the Parent record. We can select fields that need to be mapped to this record, here we can also add custom fields.

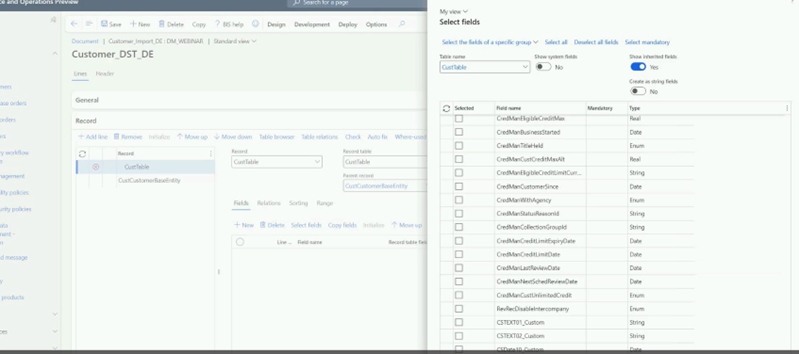
You can select the fields by clicking on the checkboxes.
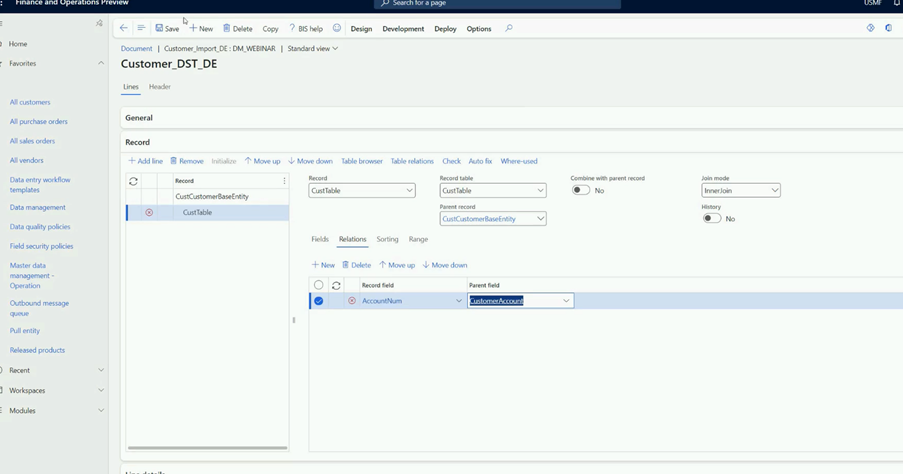
Step 3: Add new record to existing mapping
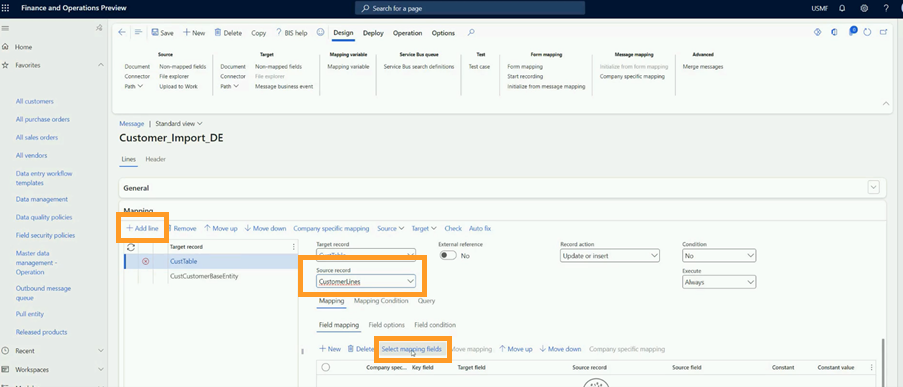
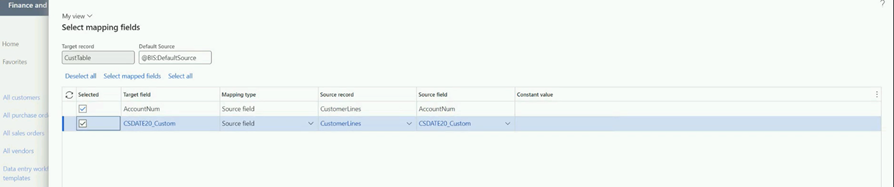
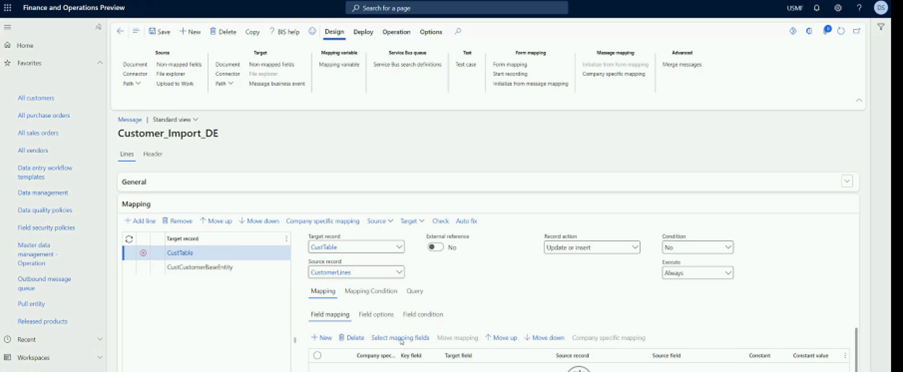
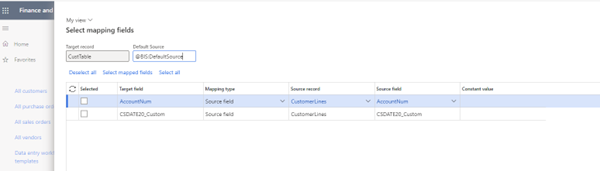
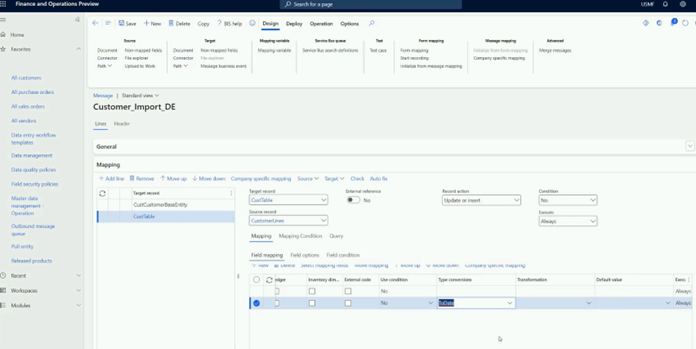
Having set the structure of the record, the next step is to add this new record to existing mapping. So, you click on +Add line, add Target and Source record. We have added CusTable and CustomerLines respectively. Next, you click on Select mapping fields.
Connectivity Studio automatically suggests the mapping. Since we are mapping a date-based field, we want to ensure the Type Conversions are correct at the database level, so we decided to double-check that. Next you scroll to the right and then click on Type Conversions and update that to ToDate. If you click on this option, you will also see the option to convert to amount, text, date format, and more options.
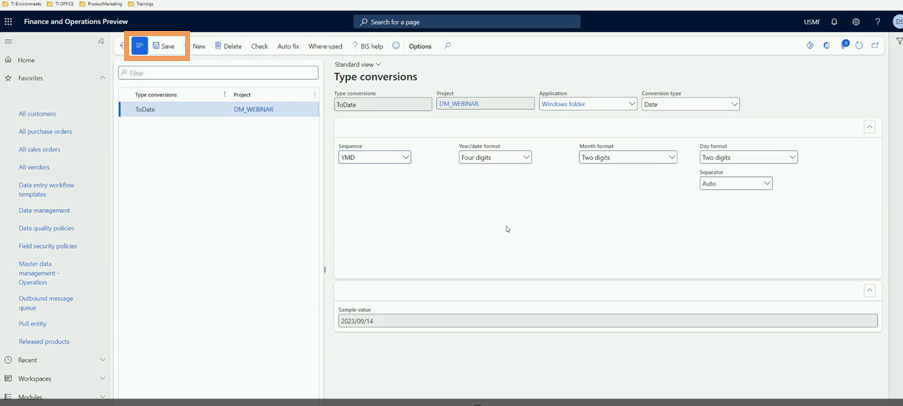
We update the settings for sequence, year, month, and date format and then click on Save in the top navigation bar.
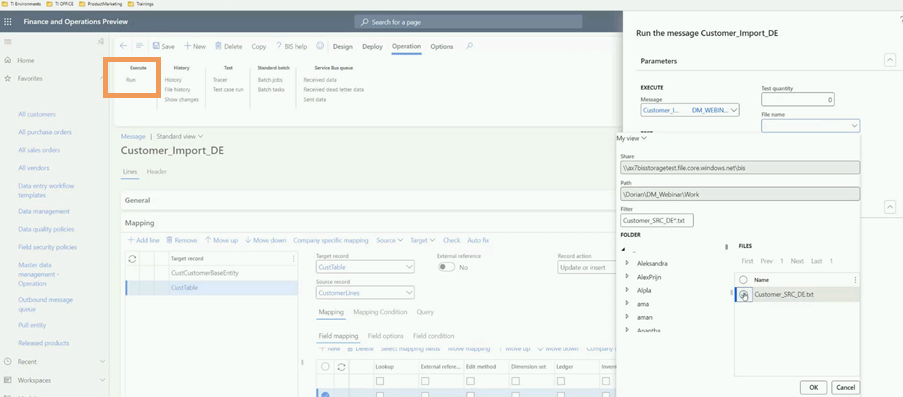
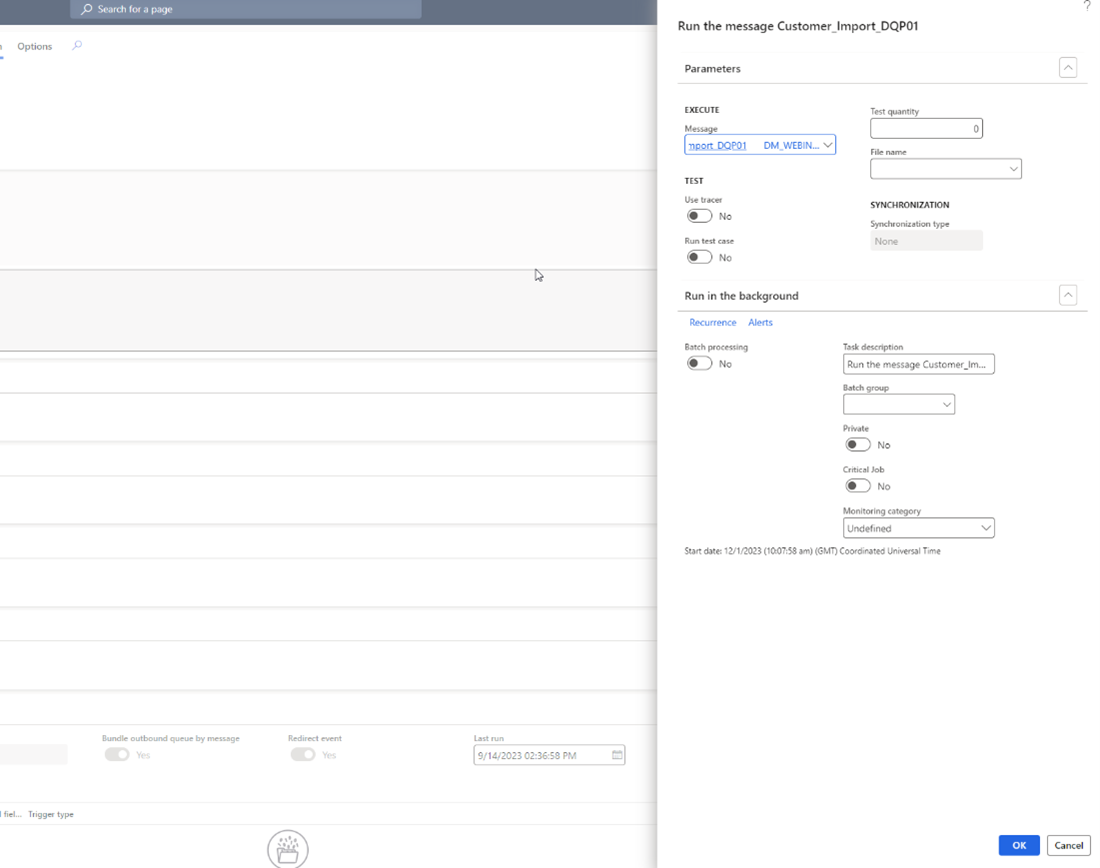
The last step here is to Save the message and then click on Run under the Execute tab. You can then check the details in the pop-up in the right and click on OK.
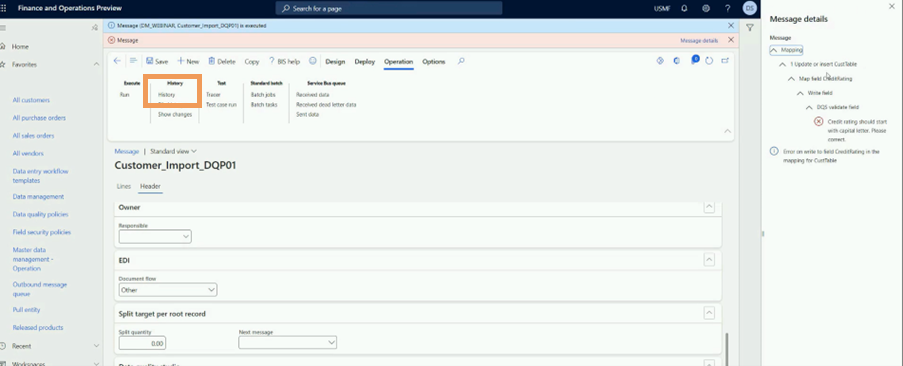
Anytime you want to check on the message, you can go to history and check message details.
Scenario 2: Customer import with validation check
In this scenario, we explain how you can improve data quality during data migrations using our Data Quality Studio solution.
Step 1: Validation rule activation
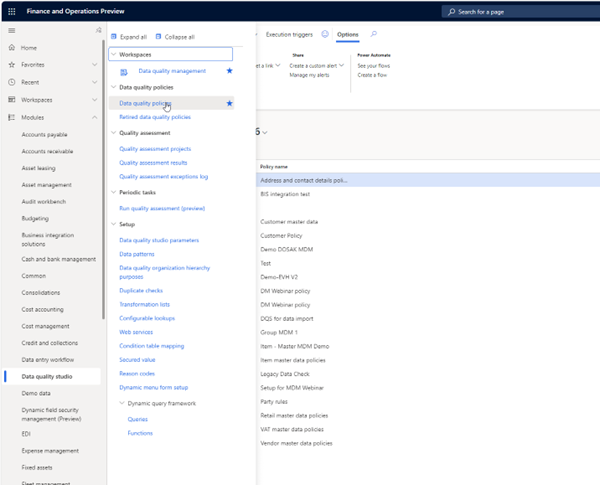
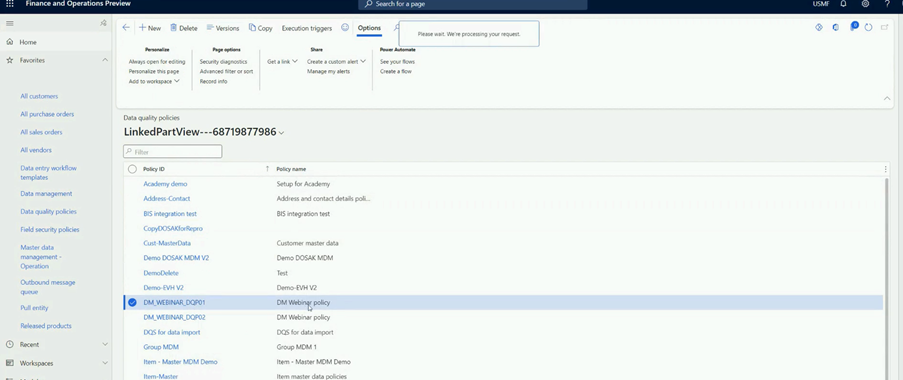
In this example, we showcase how you can add a rule for the CreditRating stream to start with a capital letter. To start off with, we click on Data quality policies from Data Quality Studio, you will see a list of available policies. For the sake of this demo, we are using a predefined data quality policy that we select from the list as shown below.
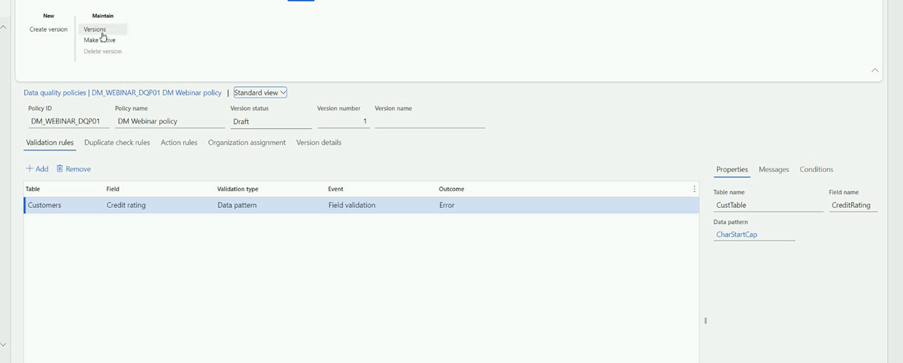
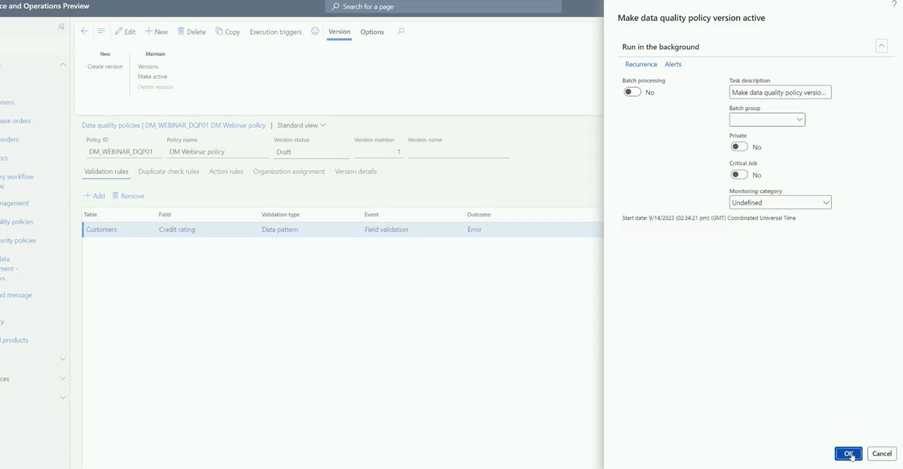
Once you select the policy, you can define the rules. Since we have already set this up, you can see the rule CharStartCap under the Data pattern field. The next step is to click on Make policy active under the Maintain tab.
After that you will see a dialogue box on the right, you can check it and then click on OK.
Step 2: Validate rule setup in Connectivity Studio
Navigate back to BIS integration design on the D365 F&SCM dashboard and under messages, you click on the message you want to test. Here we select a Customer import message.
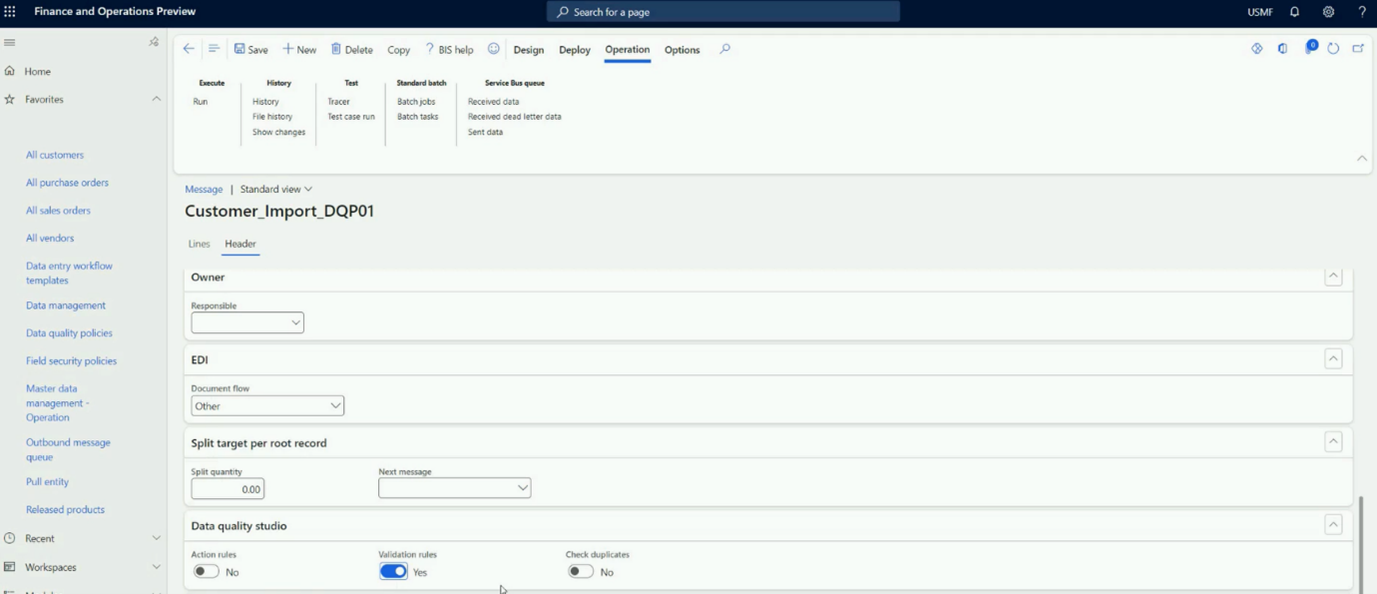
To activate the rule in Connectivity Studio, you click on the message Header tab. Next scroll down to the Data Quality Studio section and click on the rule you want to activate.
Step 3: Execute the import
Once that is done, you can click on Run under the Execute tab. You will see a pop up on the right, you can check the fields and then click on OK.
After that if there is an error, you will see an error message and you can check the details by clicking on Message details. The message will ask you to correct the CreditRating field and start with a capital letter. You can either discard this message from your data migration or correct it.
Step 4: History error management
To correct the message, you can click on History under the History tab.
Next you click on the message.
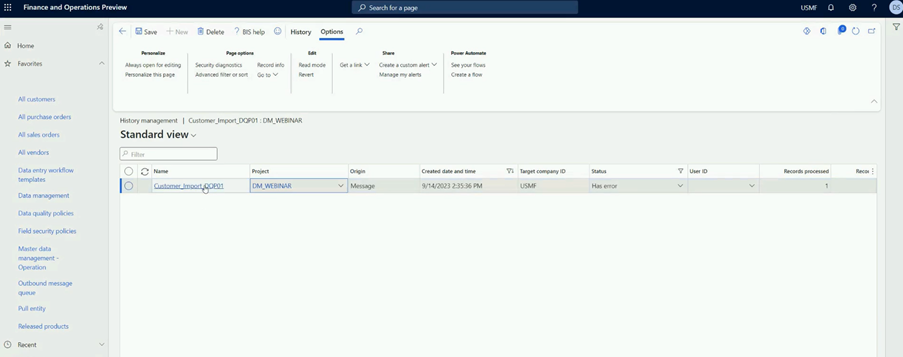
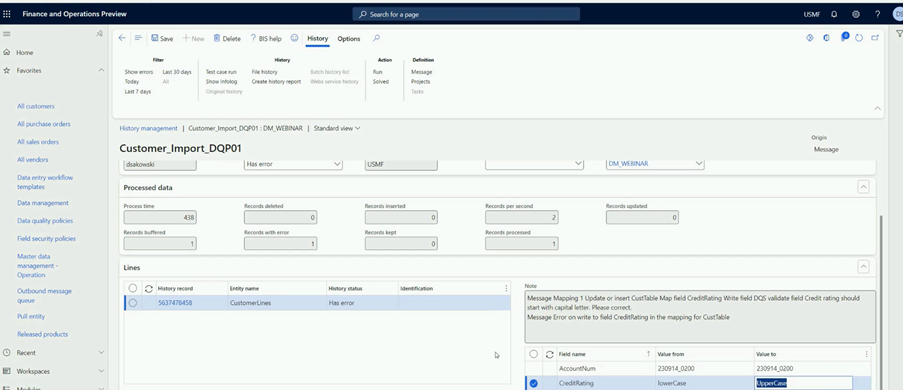
You can check more details about the error and also correct this message from this section. So, we make the change.
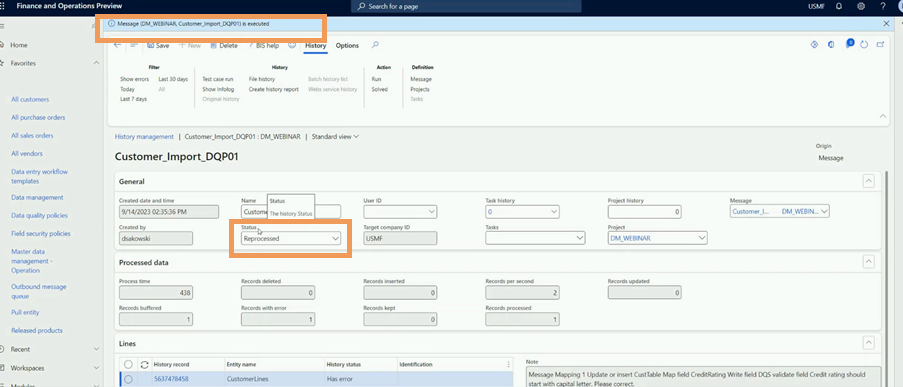
Step 5: Re-execute the import
Then click on Run under the Action tab. After that you will see a dialogue box on the right, you can click on OK. You will then see a notification once the message has been executed and if you refresh, the Status will change to Reprocessed in the record.
Interested to know more about To-Increase’s Data Migration Solution?
If your organization is considering data migration to D365 F&SCM from any legacy ERP system or even multiple legacy ERP systems, our solutions would be a great fit! If you would like to learn more about solution features or watch some more use cases, sign up for our on-demand webinar below. Alternatively, you could also reach out to our experts to discuss your business use cases.


