
Much before Microsoft announced that they would be ending mainstream support for Dynamics AX 2009 and AX 2012 on October 12, 2021, companies were in a rush to upgrade to Dynamics 365 Finance & Operations apps – such as Finance, Supply Chain Management, Commerce, and Project Operations.
However, Dynamics users were in a predicament. How exactly do they initiate an upgrade to Dynamics 365? Was it possible to upgrade from a legacy version of Dynamics AX (such as Axapta 3.0 or Axapta 4.0)? Would they have to redo all their existing customizations or request a go-ahead for a brand new (and possibly costly!) ERP implementation project?
In our journey as a reputed Microsoft ISV, we at To-Increase have helped many customers upgrade from legacy ERPs such as Dynamics AX 2009 and AX 2012 to Microsoft Dynamics 365 Finance and Supply Chain Management. Our no-code, enterprise-ready Data Migration solution is equipped to help customers test and execute data migrations from any ERP into D365 without technical support.
In this blog, we will show you how you can also easily execute data migration from any version of Dynamics AX to Dynamics 365 F&SCM in 7 simple-to-follow steps.
How to migrate from Dynamics AX to Dynamics 365 F&SCM in 7 easy steps
To migrate from Dynamics AX to Dynamics 365 F&SCM, you will need to start by creating a mapping for customers and customer groups. Next, you will have to establish a connection to the on-premise database for your Dynamics AX version. This will help you initialize the mapping and finalize it. You can use the tasks with dependencies to run the data migration project in the correct sequence and in parallel.
So, what are the 7 steps required to run a successful data migration to D365?
- Set up an ODBC connection
- Get the data model
- Create messages and mappings for the tables you need
- Extend mappings using ‘form mapping’
- Use tasks to define dependencies
- Set up the project to run a delta run
- Run the migration project
Let’s now look at each of these steps in detail.
1. Set up an ODBC connection
The first step is to set up a connection to your on-premise database. For this, all you need to do is to install an agent, and you’re ready to connect! In the connector setup shown below, you can specify the link to the Azure Service BUS and the Open Database Connectivity (ODBC) connection to the database.
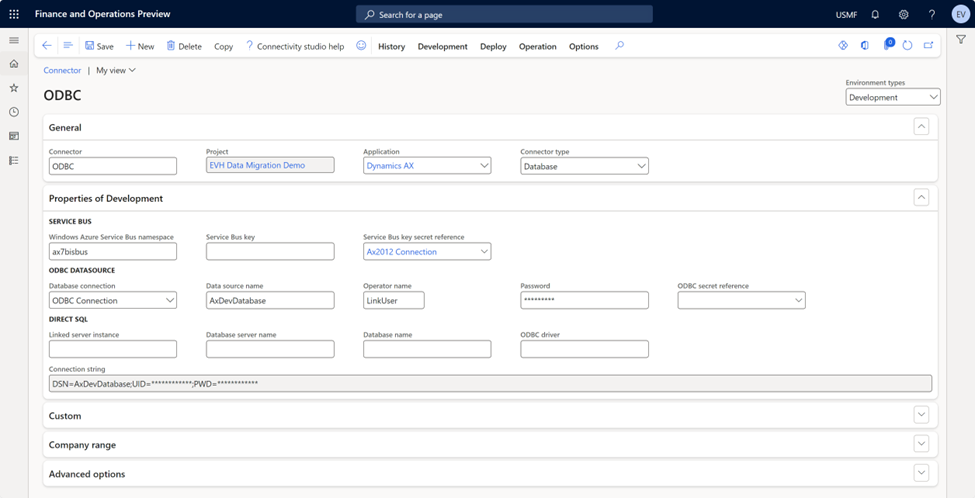
The ODBC connector can be added as a source connector to the project.
Related: Learn how you can use Microsoft Open Database Connectivity (ODBC) to help you execute a successful data migration from Dynamics AX to Dynamics 365 F&SCM, faster and more securely, in this blog.
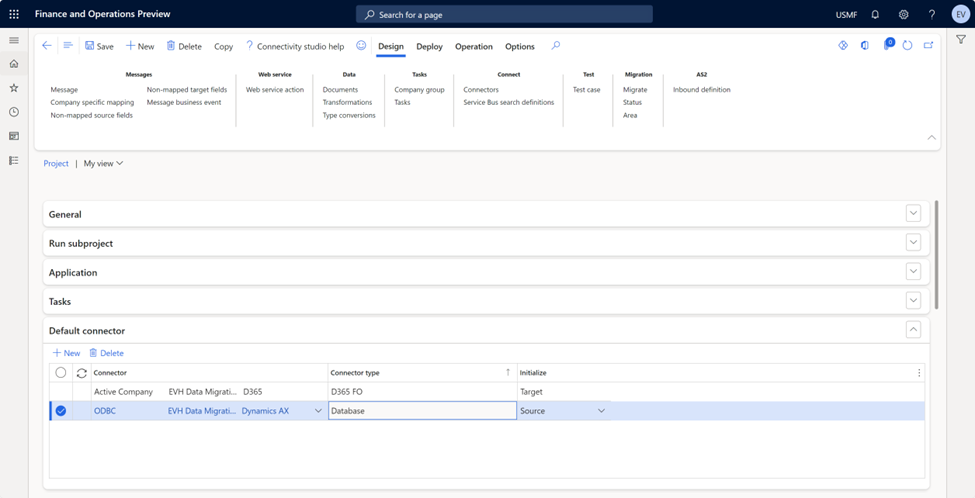
2. Get the data model
Next, you need to scan the data model and use that for the data migration. You can open the migration from the design tab in the project.

Now select the tables from the source.
You should be able to see all the standard tables as well as the custom tables. Start building your list step by step. The top grid can be used to filter the table. Use the plus sign to add the table to the selection.
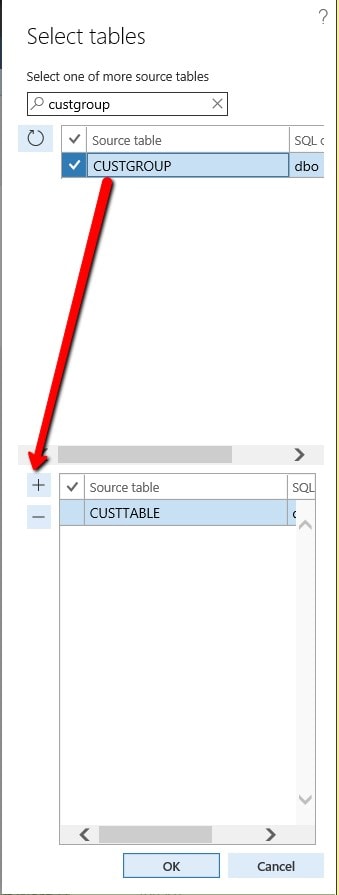
Once you select ‘OK’, the tables get added.
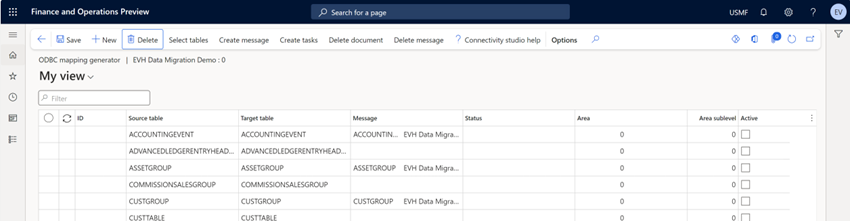
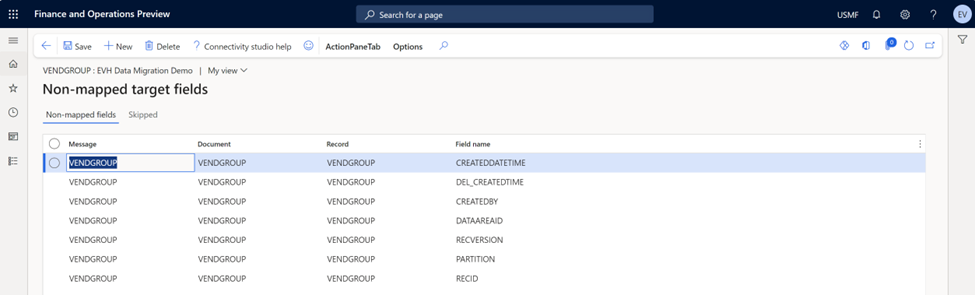
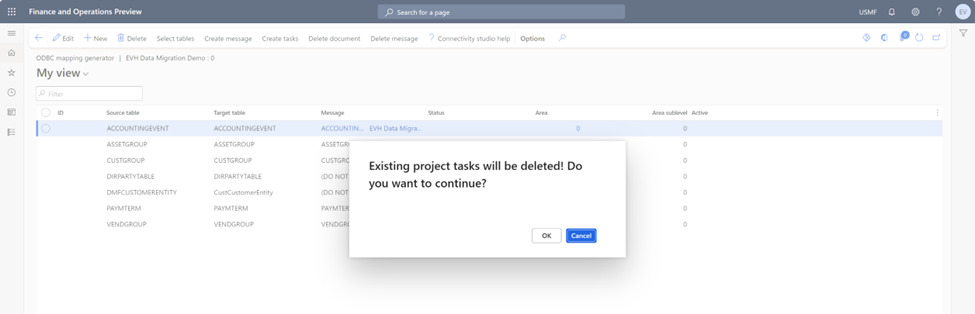
3. Create messages and mappings for the tables you need
Now that you have the data model in place, you can create messages for the two selected tables.

Now you can open the create message.

For example, you can open the vendgroup mapping and verify the missing fields.

The image below shows how the list will look like.
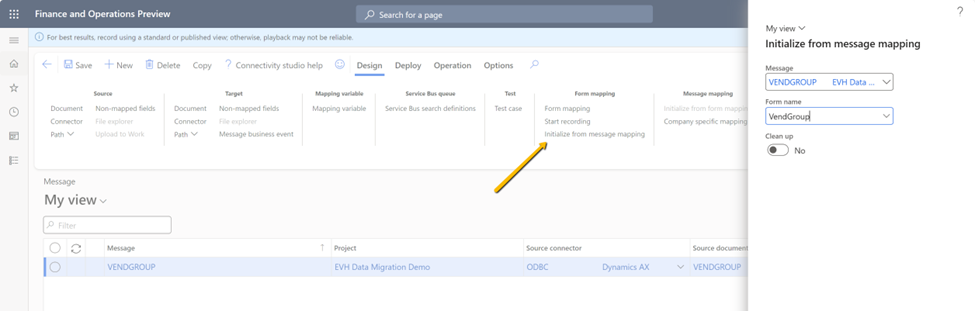
4. Extend mappings using ‘form mapping’
Next, we need to create the mapping for the missing fields. Although data entities simplify the data model, it becomes very difficult to test if there is no connection between a data entity and a form. To-Increase’s Data Migration solution can help you do the mapping by using the ‘form mapping’ function. To create mappings for the selected fields, initialize the form mapping based on the existing mapping and then start the recording.
Now you can start the form mapping. You would need to navigate to the customer group form and select the mapping between fields.
As shown below, you could use the plus sign to create a mapping for the selected fields.
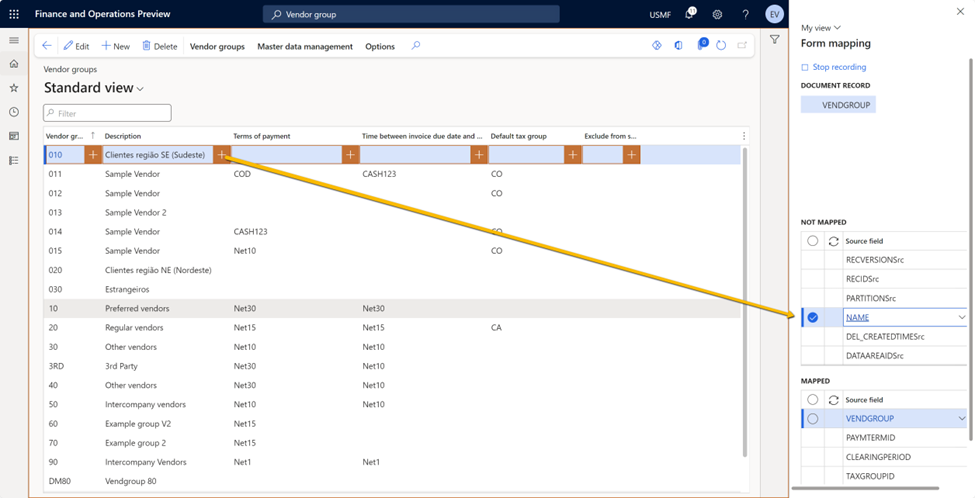
And when this is completed, you will have a form mapping that can be used for testing purposes.

And now we can start the form mapping. Navigate to the customer group form and select the mapping between the fields.
The example above is an easy setup. However, there are some challenges to consider:
- The global product table — this is where you need to change it to a master product, product version, or distinct product
- The global address book —where you need to change it to an organization or a person
- Address information — which should be updated using a view instead of a table
- Contact information — to be updated using a view instead of a table
- Financial dimension setup
- Inventory dimension setup
The benefit? You can find the context, the form, and (in the background) the data model, the fields, and the edit methods.
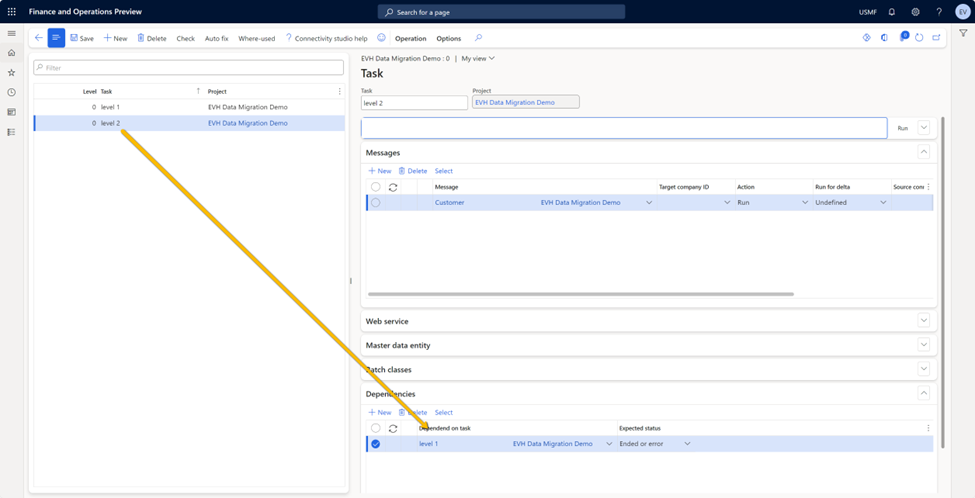
5. Use tasks to define dependencies
To ensure a smooth data migration, you would need to put the messages in the right sequence using the tasks.
In the image below, the tasks have been created with the correct dependencies.
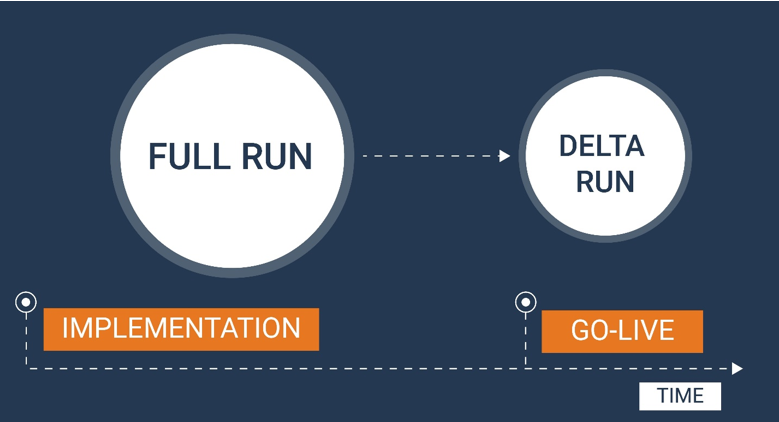
6. Set up the project to run a delta run
If you have a migration that can be executed in more than four hours, we recommend you check out the ‘Delta Run’ functionality in our Data Migration solution.
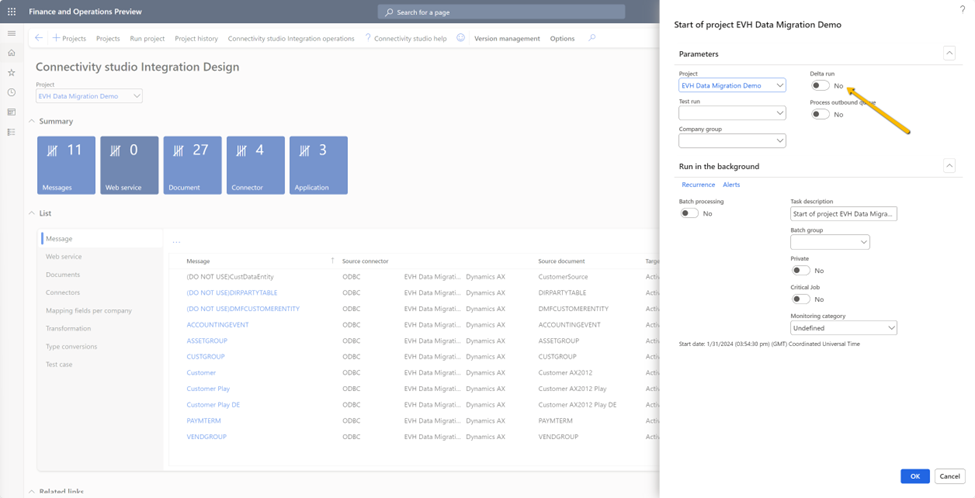
For example, let’s say you want to import the latest open transactions just before go-live, but do not want to run all the messages again because that could be time-consuming. In that case, you may only want to import the delta by using the ‘Delta Run’ option. You can define what messages to run during a delta run in the tasks. When you start the project, you can indicate that this is a ‘Delta Run’ to run the related tasks (as shown below).
You can link a set of messages per task. For each message, you can define whether it should be executed in a normal run or during a ‘Delta Run’.
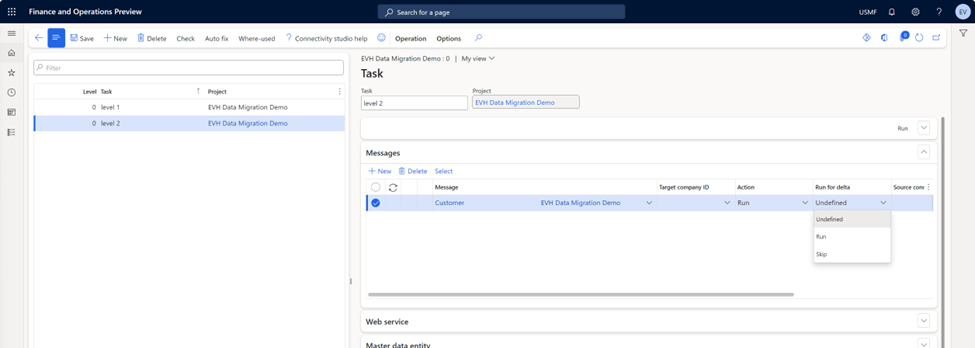
Keep in mind, however, that running a delta means that it will only insert new lines and not update existing lines. For example, it can add new customers for master data and run the transactions only when the ‘Delta Run’ is started.
Tip: During go-live, skip the master data that has not changed during the latest run to improve performance!
7. Run the migration project
Execute the project in batches, so that when the project is executed, the tasks are executed in the batch too. Each message in the same task will run at the same time, i.e. in parallel.
Enable the delta-run to import only the new records.
After the data migration is completed, you can validate the data in the history. You can utilize the form mapping to validate if the fields are being shown correctly in the form.
How can our Data Migration solution simplify data migrations for you?
Contrary to popular belief, data migration projects do not have to be daunting. By using our Data Migration solution to execute migrations from Dynamics AX to Dynamics 365 F&SCM, you can benefit from its easy-to-use, no-code features, and ensure that data is validated, de-duplicated, and enriched before and during the migration.
With To-Increase Data Migration solution, you can:
- Empower your IT department to control and execute the data migration project, without any developers
- Ensure that your data migration to D365 F&SCM can be executed with just one click
- Easily map 70% of the tables with minimal changes
- Test 100% of the migration multiple times—from fields and tables to dependencies—using tasks
- Reduce the risk of downtime and eliminate unpleasant surprises as the data migration will always run the same
Ready to embrace stress-free data migrations to Dynamics 365 F&SCM? Download our Data Migration solution factsheet linked below to understand the solution benefits and features in depth.
.png)


