
As organizations scale and data grows within the company, it is important to have processes to streamline data entry across the board. Some of the biggest challenges for our prospects are overwhelming master data forms in Microsoft Dynamics 365 Finance & Operations (D365 F&O), slow turnaround time in data entry, and errors due to the lack of validation processes and data quality rules.
When we understood from the market that while creating a master record such as a Vendor record, many fields might not be necessary to fill, or some important fields are skipped we realized the need for a data entry solution. Other challenges our customers mentioned were data stewards following up with multiple people for data entry, or the record published as master data not being validated by the designated manager.
At To-Increase, we build solutions to help our customers with their everyday challenges and simplify processes within Microsoft ERPs. We have a Master Data Management suite that comprises Data Entry Workflow for data entry management, Data Quality Studio for data quality management, and MDM Studio for master data management. These solutions help customers achieve their data governance objectives to a large extent.
Since our prospects are interested in how our solutions work before they take time out for a demo with our experts, this blog will showcase the ease of creating a vendor master data record in D365 by demonstrating an example using our Data Entry Workflow and Data Quality Studio solutions.
How to create a new vendor master data record in D365 F&O using a Data Entry Workflow template?
Below you will find an explanation for first creating a template using our Data Entry Workflow solution and post that we will show you how the template can be used to create a Vendor Master record. This is an example of a configured template and showcases just a few features of our solution. There are several other templates you can configure using our solution based on your organization’s requirements.
Some important criteria considered while creating the template:
-
Validation of the VAT number:
Accuracy of the VAT number is a critical aspect of a vendor record. To perform the validation, Data Entry Workflow is integrated with Data Quality Studio, which helps us connect to an external webservice to check the accuracy of the VAT number. -
4-eye principle to ensure accuracy of data:
In order to ensure that the vendor bank account details are entered and are correct, mandatory checks and IBAN validations are included. Since the entered bank account number should be a valid one, an approval step is included in the workflow. -
Segregation of duties:
Every step in the workflow has an Assignment group option which allows you to assign the step to a person. In this way, the person creating the vendor record has limited access to enter data but cannot edit or approve data. There are two steps in the template - the first is for data entry assigned to the clerk, and the second is for validation assigned to the manager.
A quick glance at how certain validations can be set up using Data Quality Studio
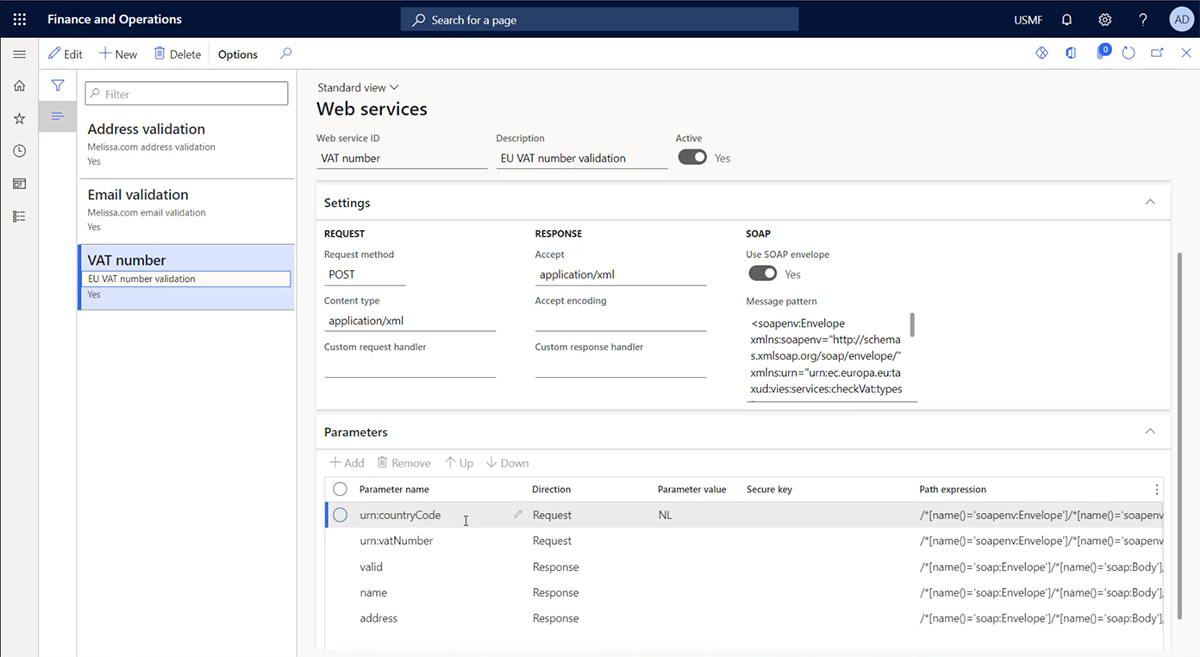
In the screenshot below, you can see the setup of web service validations which can be used for different type of validations such as address, email, contact, VAT number, and more. One thing to note is that external web services are to be licensed separately and incur an additional cost.
For the sake of this demo, we have added three web services for address validation and automatic population of data, email validation, and VAT number validation. The parameters in the image below are the inputs to the web service, and its corresponding response is displayed.
Explaining the template creation for Vendor Master Data Record
The workflow template consists of two steps named as Vendor Details and Approval Vendor Details Step.
Data Entry Workflow solution once purchased will be visible under the Dynamics 365 dashboard. Template creation can be started from the sub-menu, once you click on Data Entry Templates. Data entry workflow allows you to select only the required fields from the group of many fields. This can be directly recorded from the vendor forms as shown below. Once the required fields are recorded, control automatically returns to the template.
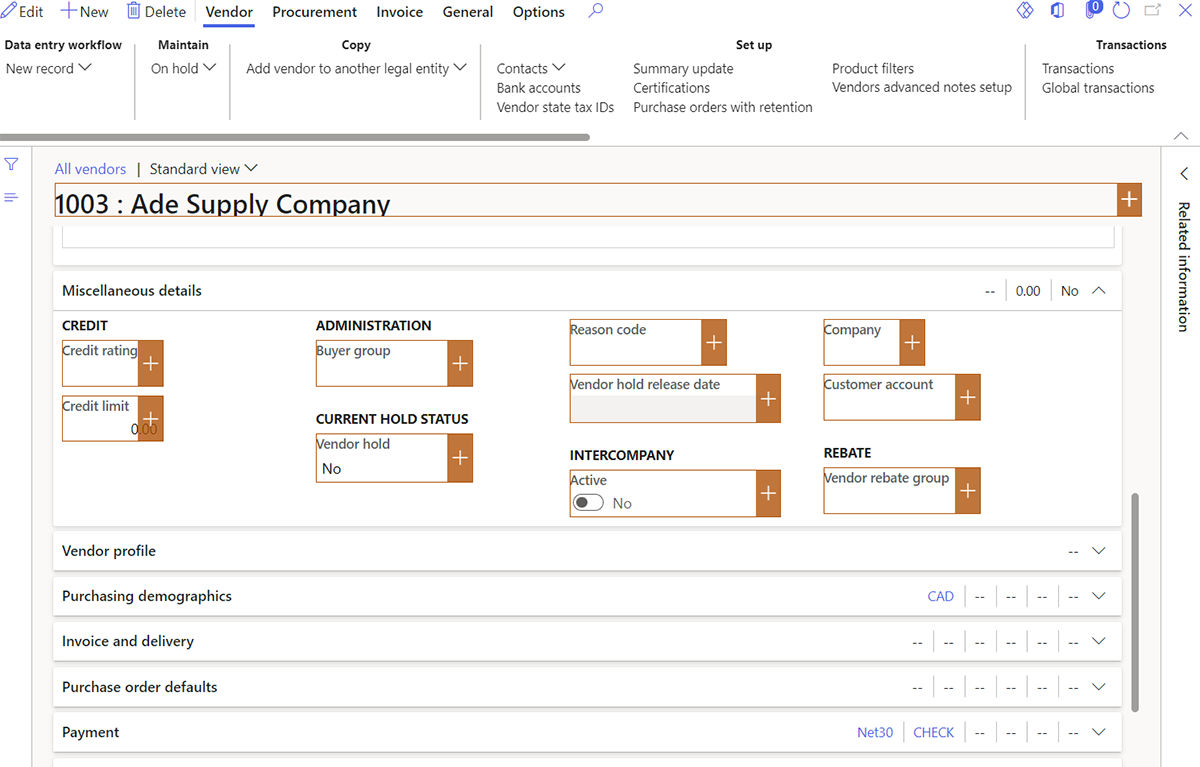
The form recording feature in Data Entry Workflow above
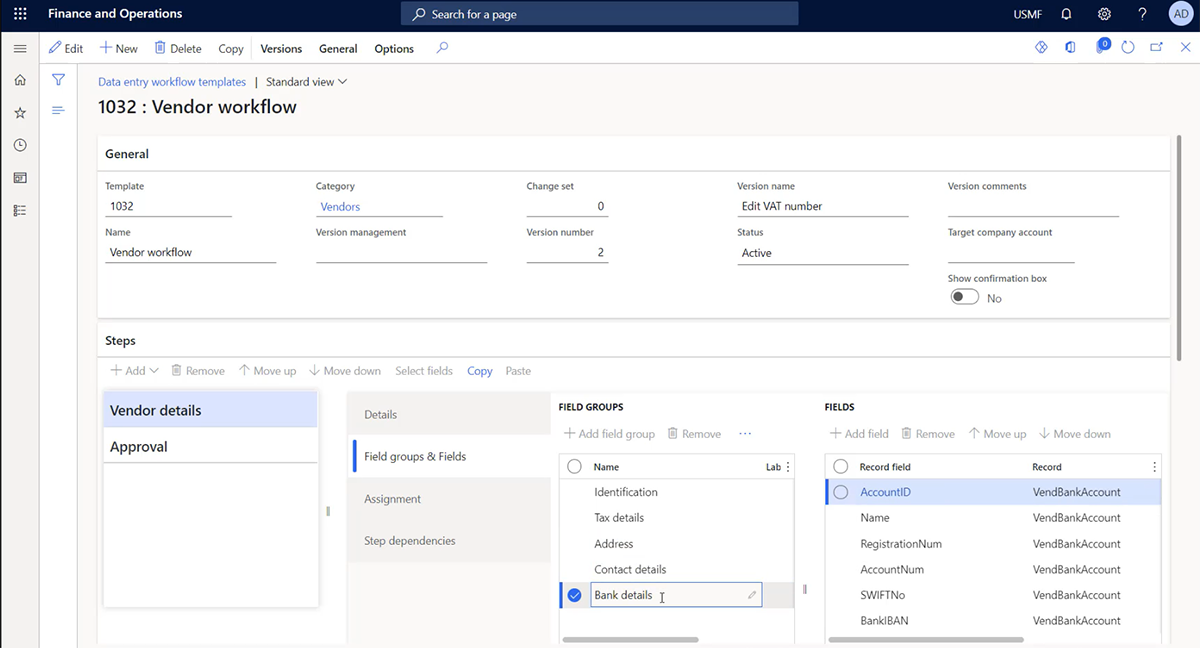
Under the Vendor Details step, multiple record fields are added and grouped under different fields. The Bank details field consists of Account ID, BankIBAN, SwiftNo, etc. as shown in the screenshot below. Similarly, the Identification field consists of Account number, name, Vendor Group, and Currency. In the same way, Tax details (Tax group, VAT number), Contact (Email, Phone), and Address (Zip Code, State, Province etc) details are added.
This step for data entry has been assigned to a junior employee.
While creating this template and adding fields, you can also make critical fields mandatory, make fields non-editable and add field length. You can also assign time limits for the whole step under Vendor Details.

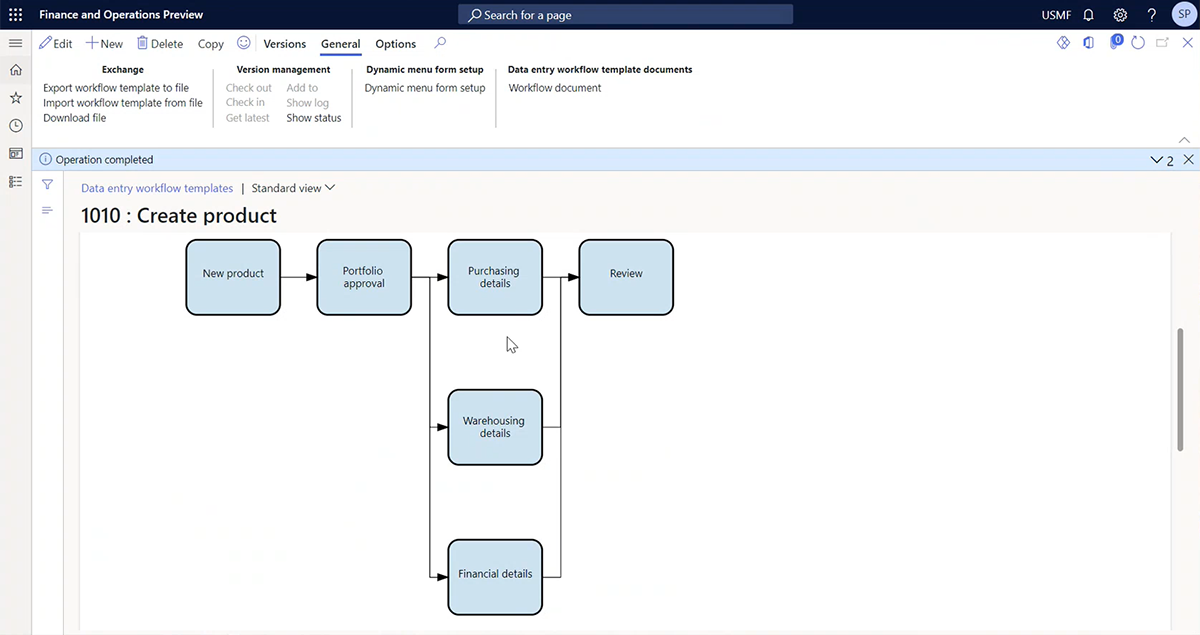
You can also define dependencies during this step. So, some steps can be subsequent steps, while some steps can also run in parallel. We have a workflow diagram within the solution that captures the defined guidelines visually. Using parallel steps, you can speed up data entry as multiple people can work on different steps together. We share an example from another workflow template below to illustrate this:
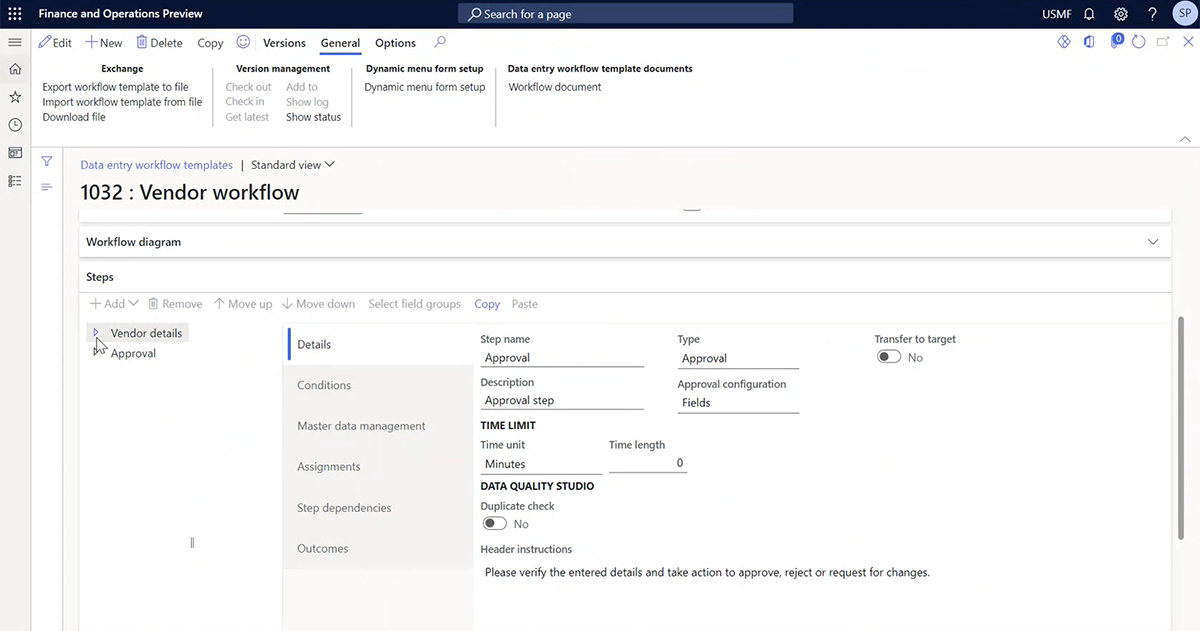
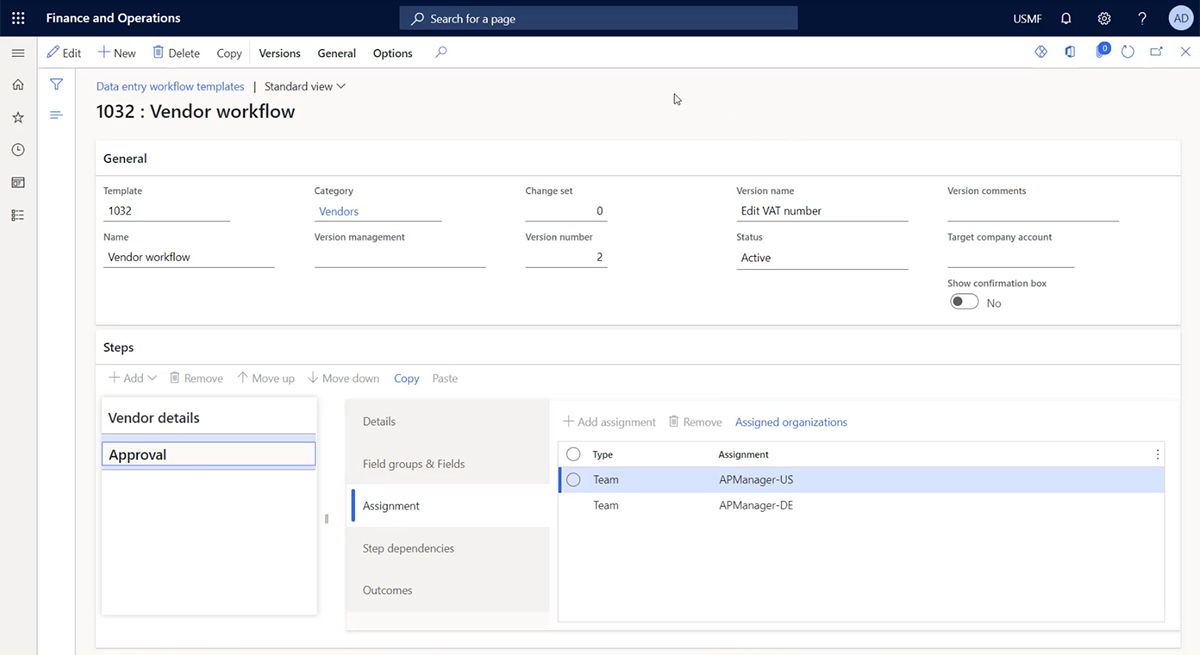
The approval step
Every step can be assigned to a particular user or a team or a specific security role. In this way the access can be controlled. Additionally, it’s also possible to make the availability of templates to specific organizations.
For the current template, the Vendor details step is assigned to AP Clerk US to access US companies within D365 and AP Clerk DE is granted access to German entities within D365. Similarly for the Approval step, AP manager US and AP Manager DE roles have been added.
Approval step can lead to acceptance or rejection. The Manager has the option to review each individual field and approve or reject or can approve all fields in one go. In case any field is not correct, the Manager can leave a comment and reject it. In this case, the workflow goes back to the step where it has been entered. The person responsible for that step will receive a notification using Microsoft’s standard functionality.
Using the Template to create a new Vendor Master Record
Step 1
The first step is assigned to the clerk that has limited access as a junior employee. So, the clerk logs into Finance & Operations, clicks on Accounts Payable, and then clicks on All Vendors.
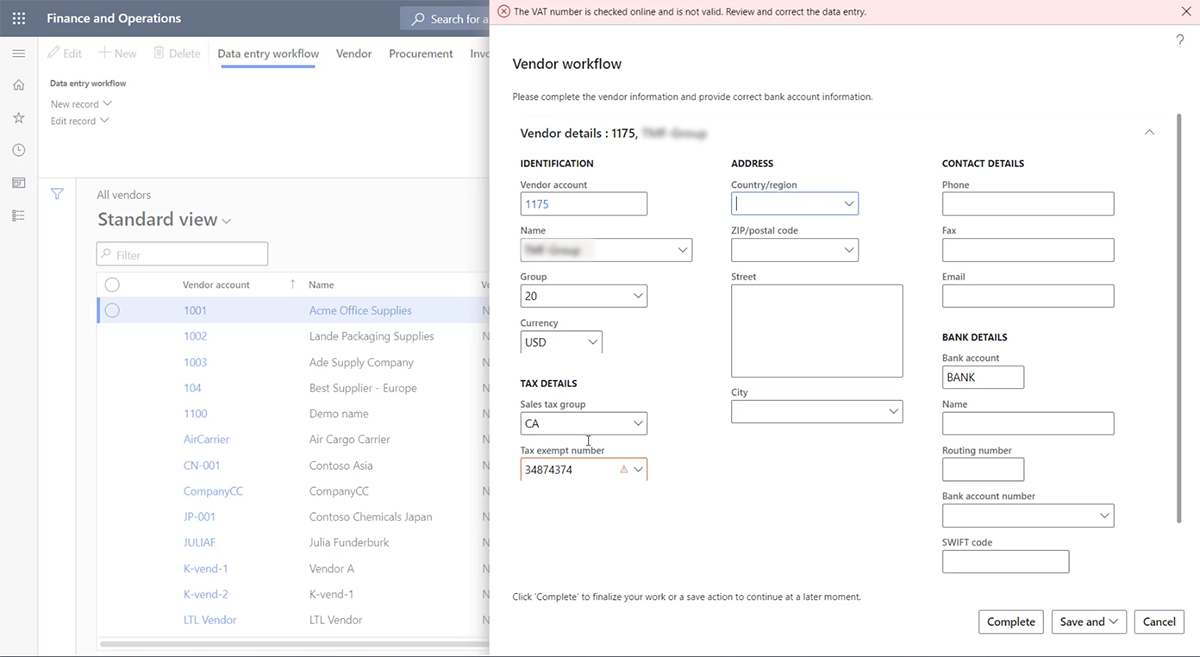
He/She can view details but cannot edit, delete, or maintain vendors as the access is limited. However, using Data Entry Workflow, the clerk can create a new record using the template designed. So, the clerk clicks on create New record using the template through the Data Entry Workflow option. This will open the form with only the fields defined in the Vendor Details Step of the template.
When the assigned user enters an incorrect tax-exempt number, due to the integrated validation with web service, the configured error message is displayed.
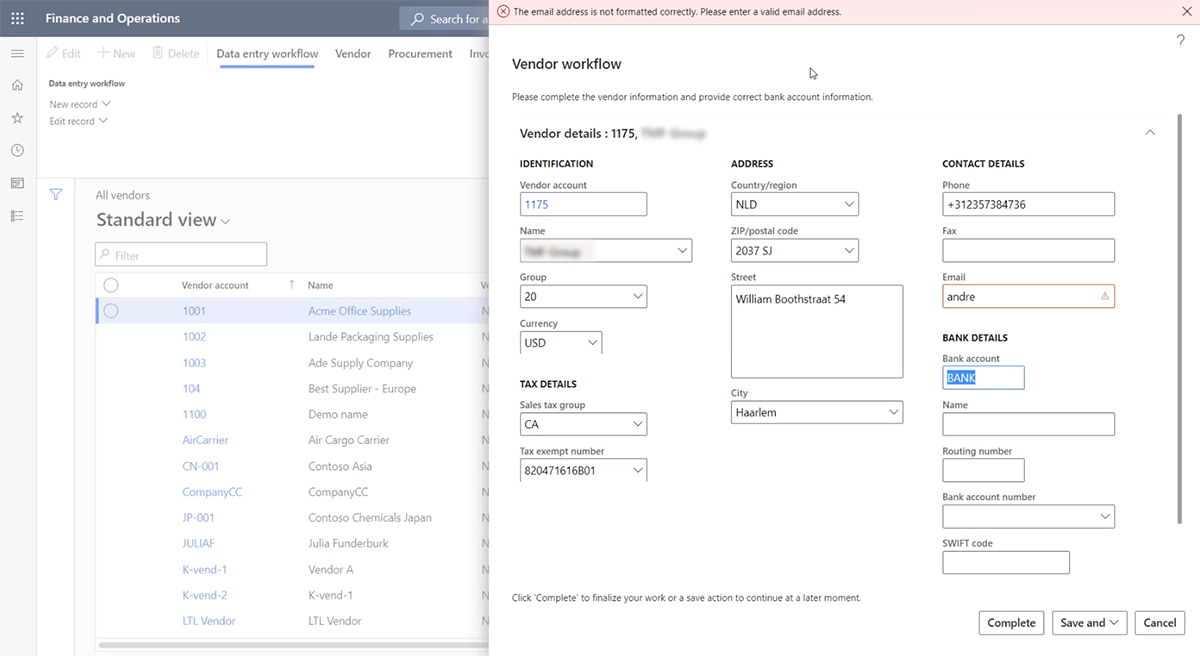
Similarly, as the configuration is set up to validate through web service for the address, when part of the address is entered, it auto-populates the entire address if it’s a valid one.
Also, the email address and phone validations are performed. In the image below you can see when the email domain is not correct, the validation has been triggered. When the data entry is complete, you can click on Complete, and step 1 will be completed.
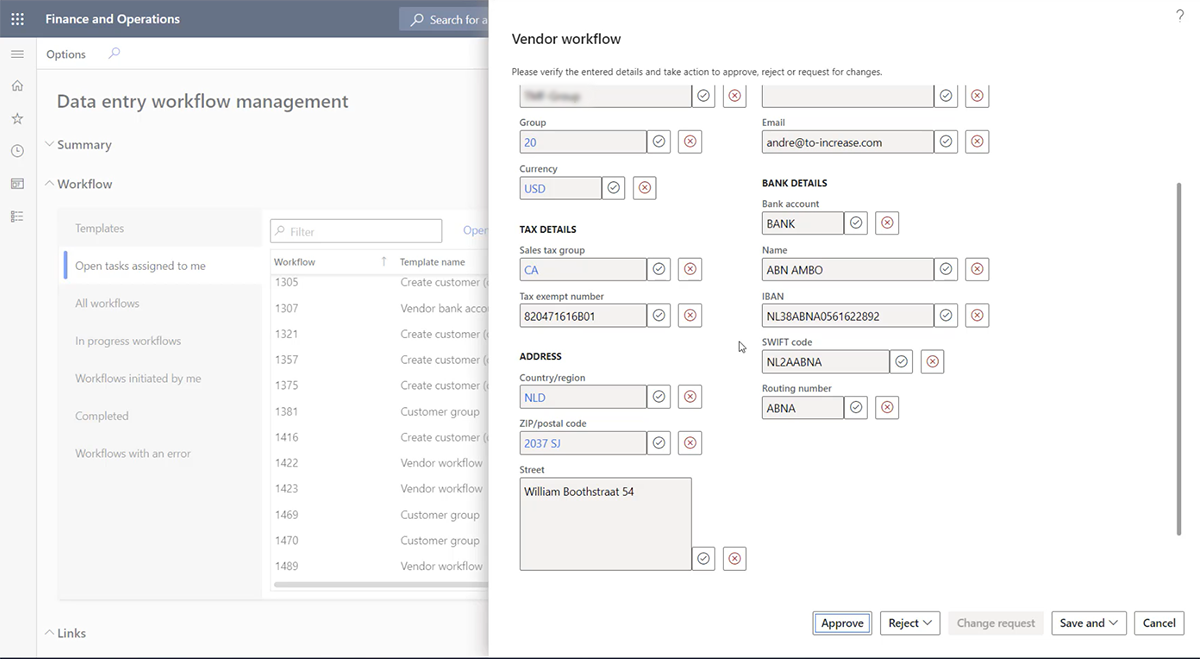
Step 2
Next, the manager has to log into the data entry workflow module, click on Data Entry Workflow Management and click on open tasks assigned to me. Since the first step is completed, the workflow goes to the approval process, and the vendor record is only created in the master data after that. Under all workflows, the Manager will be able to see the Vendor workflow assigned to him/her for approval. The Manager can review the fields and approve them in one go by clicking on the Approve button at the bottom, or they can individually approve or reject each field using the check or cross buttons provided for fields. If they reject a field, the solution opens a window where the Manager can provide feedback. A rejected field will trigger the workflow being assigned back to the clerk to update the data in the field that was rejected.
Are you keen to streamline your data entry process for D365 F&O?
This blog showcases how our solutions for Dynamics 365 – Data Entry Workflow and Data Quality Studio can help you simplify data entry, increase efficiency, and reduce the margin for errors. So, tasks such as creating a new vendor record and using it for transactions can be done quickly and with lesser issues.
If you have any other scenarios in mind that you would like our experts to demo, please contact us by filling out the form below. However, before you do that, we recommend downloading our factsheet for our Master Data Management suite of solutions which explains the benefits and features of using our data governance and management solutions.


