We are starting a new tutorial series and hope you find it useful. The main intended audience for the series is experienced Microsoft Dynamics AX consultants or developers who are new to To-Increase EDI Studio and Connectivity Studio. A consultant or developer interested in this tutorial series should be familiar with Dynamics AX 2012 as well as relational database concepts.
As you probably know, 3PL stands for third-party logistics. Logistics can include elements of warehousing, transportation management software, freight rate negotiation, and much more. There are thousands of 3PLs in the market, each with different models and performing different tasks. The basic and common 3PL models are: Broker, freight forwarder, warehouse 3PLs, and enterprise 3PLs. In our tutorial, we talk about 3PLs as warehouse 3PLs.
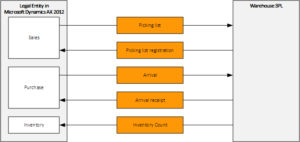
In today’s tutorial, you learn how to set up To-Increase EDI Studio for Microsoft Dynamics AX for your picking process. We configure and set up all the EDI document flows mentioned in the diagram below, which is an overview of all the document flows supported by EDI Studio.
Before you start, make sure that you have EDI Studio and Connectivity Studio:
- Download a ready-to-use demo VPC from the To-Increase FTP or email customeroperations@to-increase.com to request access.
- Download Business Integration Solutions from the the partner portal and install them in your development or playground environment.
- Download a completed Connectivity Studio project with messages or create the messages yourself using this step-by-step tutorial.
This tutorial series uses the demo VPC and example company USMF.
Step 1: Import and Prepare Business Integration Solution Project
Before you can start working with EDI Studio you have to import the message and modify the Windows folder connector. The first step is to import the project.
Import Project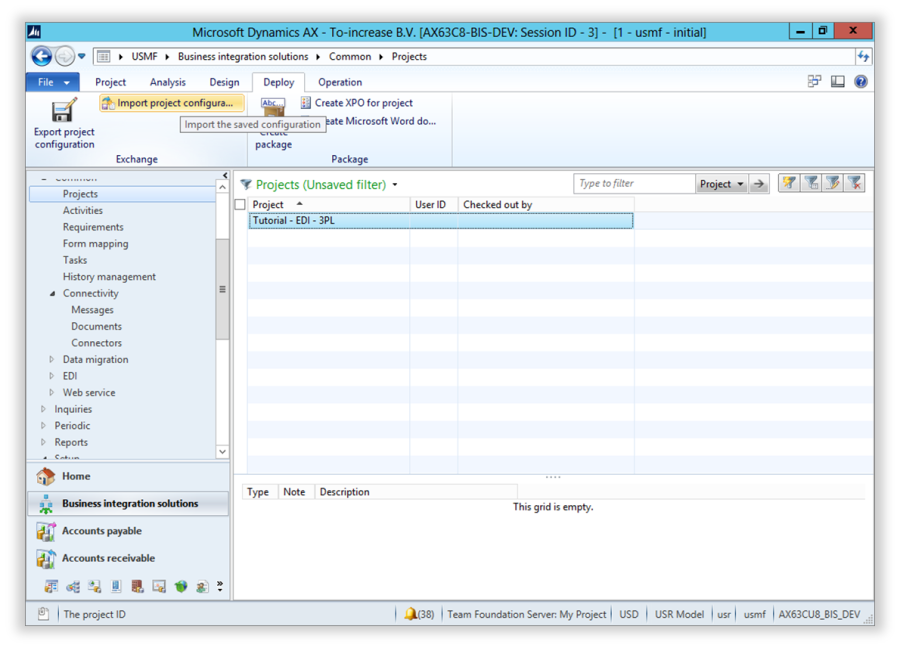
- Navigate to Business integration solutions > Periodic > Import configuration.
- Select your XML project file in File name field.
- Click OK.
- In the dialog box, click OK and the project will be imported.
Tip: If the project import is finalized it is recommended to check if you have any warning indicators (red dots) on the related project elements (for example, migrations, services, connectors, documents, messages). If there are warnings, you can click on the warning indicator to get more information about the warning.
Set up Windows Share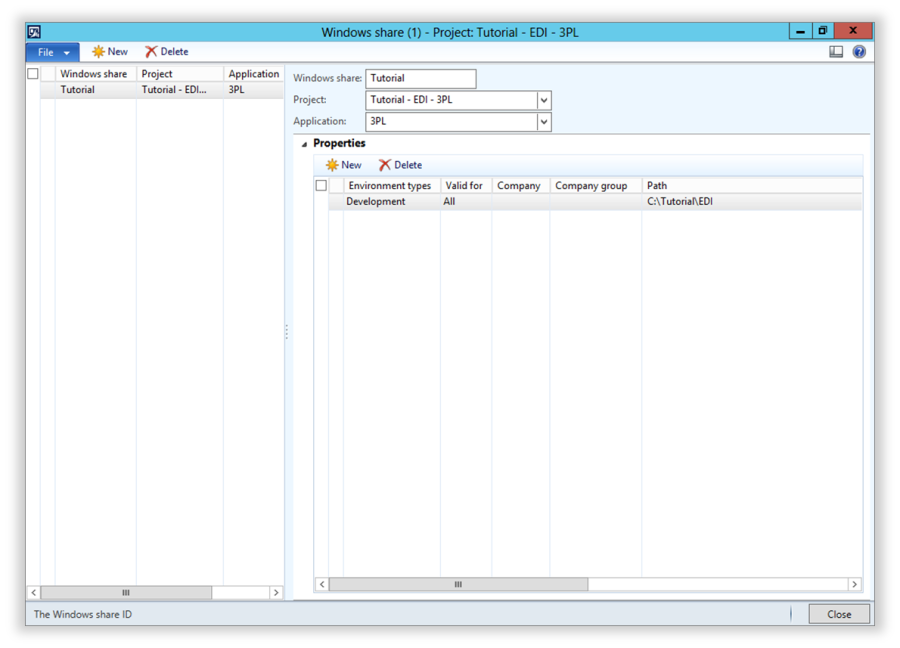
Now you have to set up the Windows share in Connectivity Studio. Before you set up the Windows share make sure that you have a folder share with read and write permissions for your current user account and the AOS service account.
- Navigate to Business Integration Solution > Projects
- Select Project 'Tutorial - EDI - 3PL' in the table.
- In the Design tab in the Action Pane, click Windows shares in the Connect group.
- Select Windows share 'Tutorial' in the table.
- In the Properties FastTab, select the first line in the table.
- Enter your folder share location in Path field.
- Click Close.
Tip: You can set up your Environment type on the Business Integration Solutions > Setup > Business integration parameters.
Step 2: Set up Legal EntityLet's move on by setting up a USMF company for EDI.
Legal Entity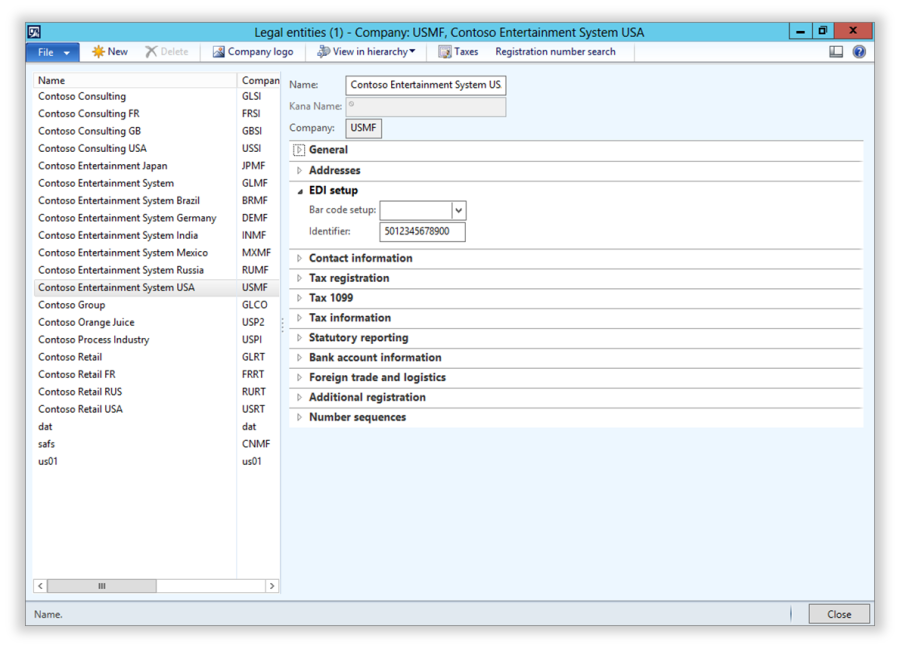
- Open Organization administration > Setup > Organization > Legal entities.
- In the EDI Setup FastTab enter '5012345678900' in the EAN code field.
- Click Close.
Now that you've set up the legal entity for EDI, you also must set up the warehouse party and document flows.
Party Setup
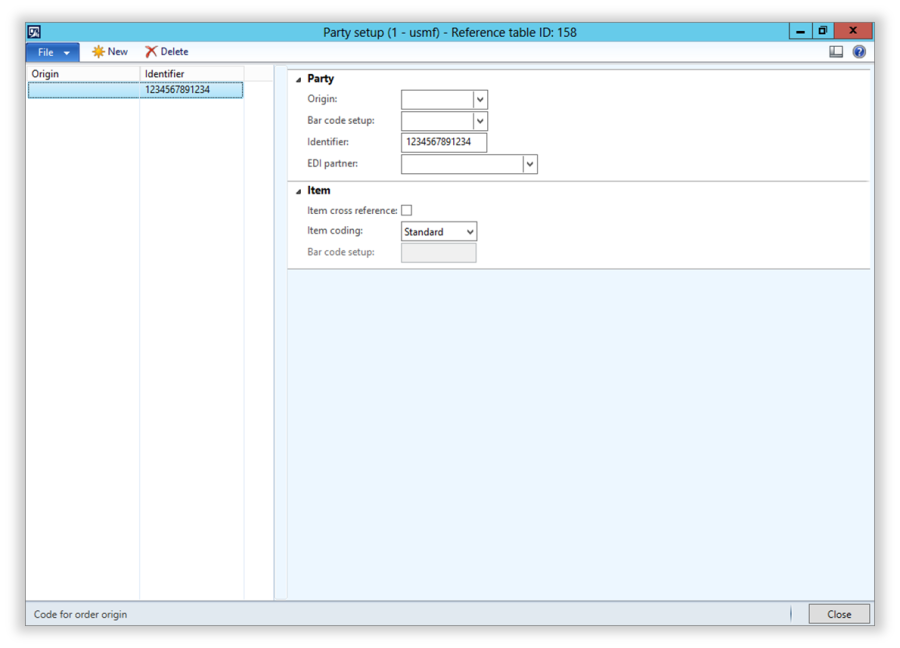
- Navigate to Inventory management > Setup > Inventory breakdown > Warehouses
- Select Warehouse '11' in the table.
- Click Party Setup.
- In the Party setup form, click New.
- Enter '1234567891234' in the Identifier field.
- Click Close.
- Click Close to close the Warehouses form.
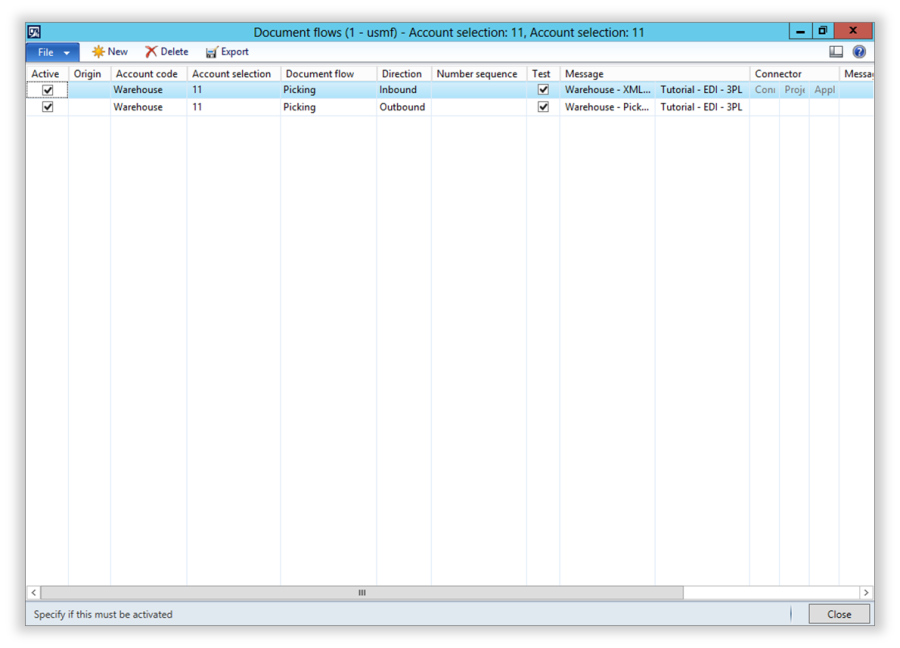
- Navigate to Business Integration Solution > Setup > EDI > Document flows
- Click New.
- In the new line, select Warehouse in Account code field.
- Select '11' in Account selection field.
- Select 'Picking' in Document flow field.
- Select 'Outbound' in Direction field.
- Select Test field.
- Select 'Warehouse - Picking list to XML' in Message field.
- Click New.
- In the new line, select Warehouse in Account code field.
- Select '11' in Account selection field.
- Select 'Picking' in Document flow field.
- Select 'Inbound' in Direction field.
- Select Test field.
- Select 'Warehouse - XML to Picking list reg.' in Message field.
- Click Close.
Now it gets serious! In this step you'll add a sales order in Microsoft Dynamics AX 2012 and send the outbound picking list message to your (fake) 3PL warehouse.
Add Sales Order
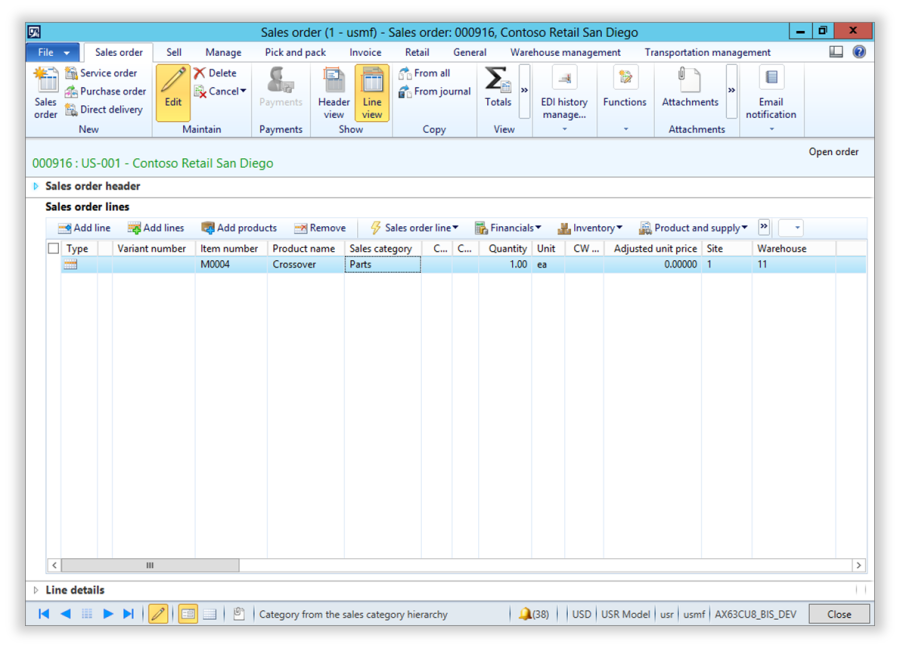
- Navigate to Accounts receivable > Common > Sales orders > All sales orders
- In the Sales order tab in the Action Pane, click Sales order in the New group to create a new sales order.
- Select 'US-001' in the Customer account field.
- Click OK.
- In the new line, select 'M0004' in Item number field.
- Press Ctrl+S to save the Sales order.
Posting Picking List
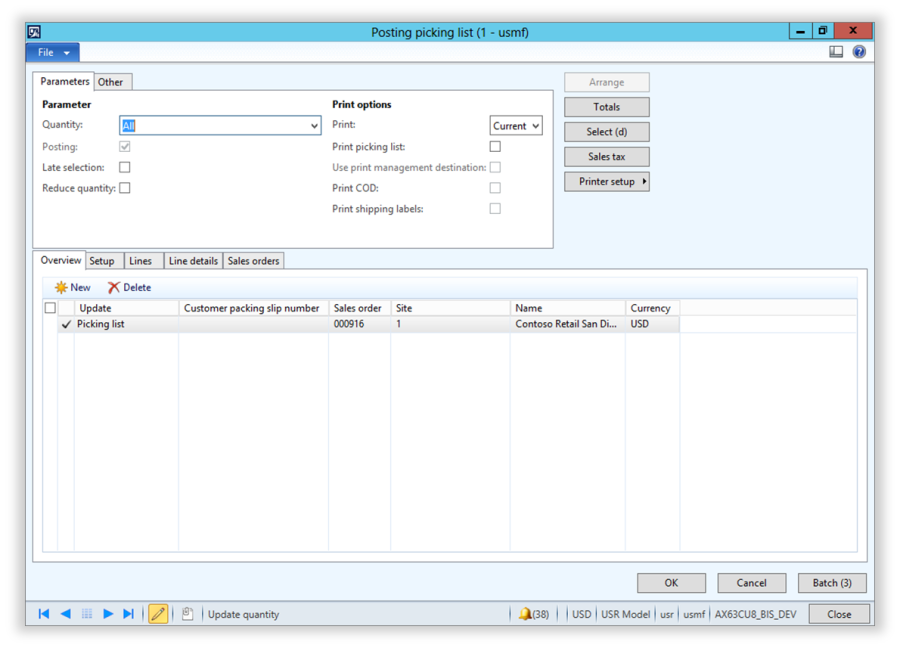
- In the Pick and Pack tab in the Action Pane, click Picking list in the Generate group to create a picking list.
- Click OK in the dialog.
Tip: You can verify the current Handling status of the Picking list from the Sales order: In the Pick and Pack tab in the Action Pane, click Picking list in the Journals group.
Process Outbound Picking List Message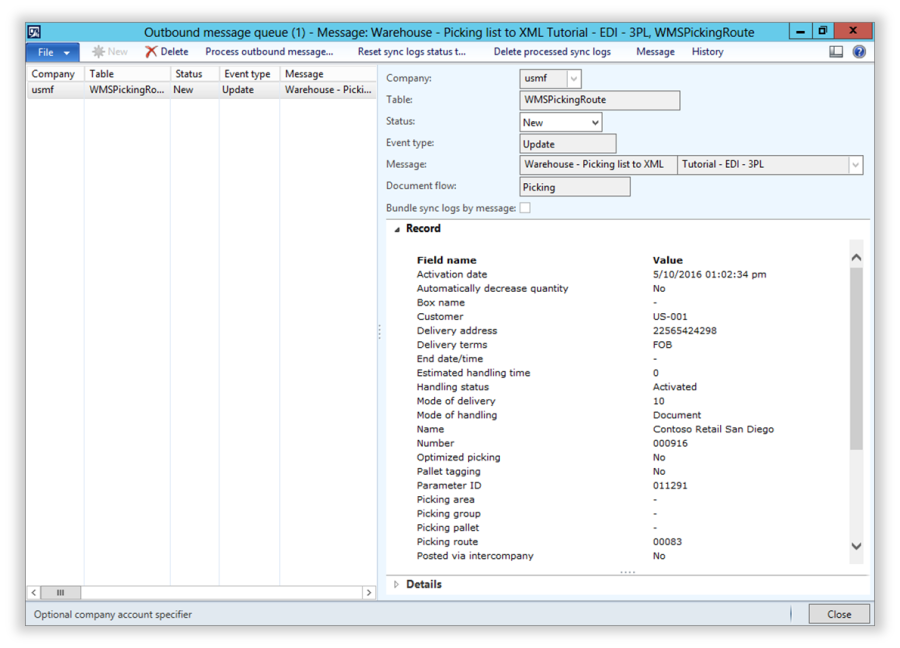
- Navigate to Business Integration Solution > Inquiries > Outbound message queue.
- Click Process outbound message...
- In the dialog, you can leave Message field empty to process all the messages in the queue.
- Click OK.
To verify if the outbound picking list message has been process, you can view the EDI history management.
- Navigate to Inventory management > Setup > Inventory breakdown > Warehouses
- Select Warehouse '11' in the table.
- Click EDI history management to check if you have a new outbound picking document flow entry.
Tip: You can find the XML output file in your folder share location.
Step 5: Receive Inbound Picking List Registration MessageFor the sake of this tutorial, you can just reuse the XML output file for this step. However, you have to exchange the sender and recipient. Once that is done you can receive the inbound picking list registration and reviewing the picking list handling status.
Exchange Sender and Recipient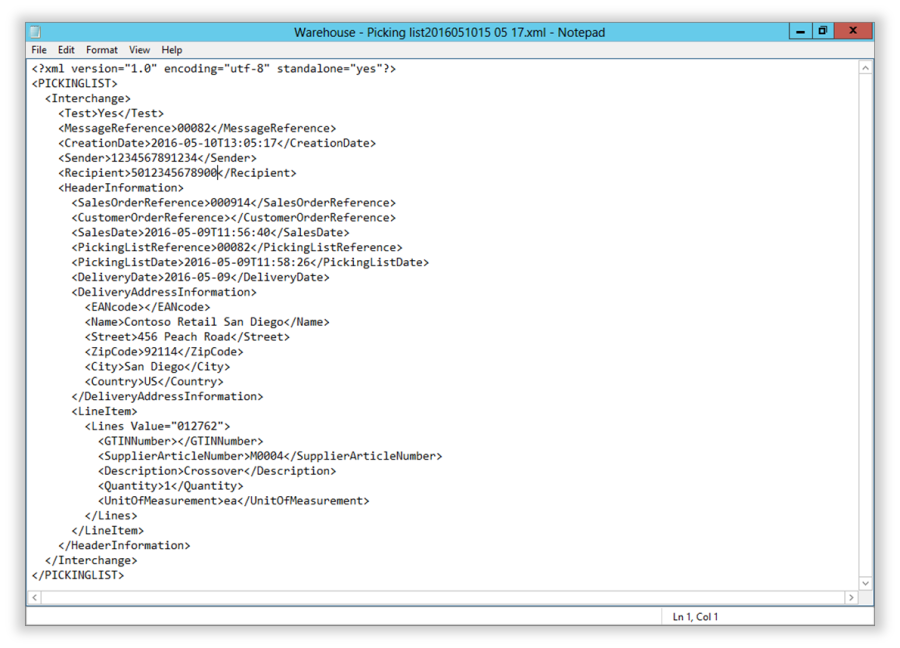
- Open your XML output file from your Folder share location in your favorite text editor.
- Exchange the values between the Sender and Recipient tags. In the Sender tag you should have '1234567891234' and in the Recipient tag you should have '5012345678900'.
- Save the file in your Work folder.
- Close the file.
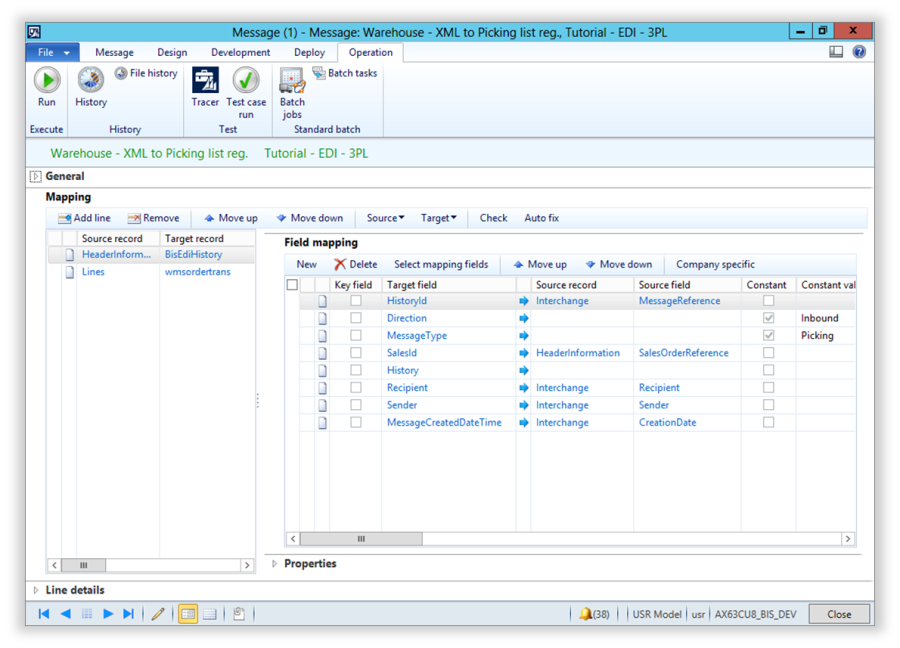
- Navigate to Business integration solutions > Common > Connectivity > Messages
- Select Message 'Warehouse - XML to Picking list reg.' in the list.
- In the Operation tab in the Action Pane, click Run in the Execute group to receive the picking list registration.
- Click OK.
Tip: Click History to view the message history. Here you can also find any related error messages.
Review the Picking List Handling Status
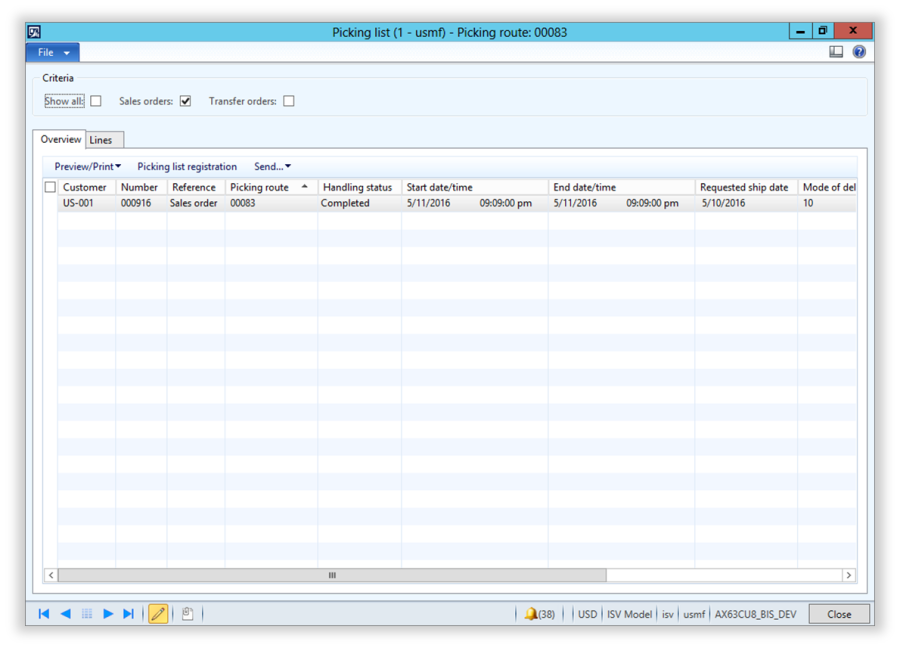
- Navigate to Accounts receivable > Common > Sales orders > All sales orders
- Select your sales order in the list.
- In the Pick and Pack tab in the Action Pane, click Picking list in the Journal group to view the current handling status of the picking list.
- The Handling status should be 'Completed' by now.
- Click Close.
Thanks for following along! I hope this tutorial helped you become more familiar with EDI Studio. If you need more information about EDI Studio, please contact us. If you have any suggestions for improving the tutorial, please let us know, and we will be happy to incorporate them when we can. Please contact To-Increase.
The next tutorial will guide you through the setup of EDI Studio for your receipt lists.